
According to different sources there are around 5 billion mobile devices in the world. That number is growing every year. Look around, today almost everyone has a mobile device such as a smartphone or a tablet.
With that number of devices, the need for mobile applications is growing. Today, for many companies, it’s not enough to have only web applications of their products. People want to use mobile applications instead.
There are two major mobile platforms out there: iOS and Android. If a company decides to build a mobile application it may choose one of these platforms to start on. More often companies want to have mobile applications on both platforms. One way, the original way, to develop a mobile application is to use native development tools and programming languages for each platform. To build iOS applications one can use Swift or Objective-C programming languages, for Android applications - Java or Kotlin.
So, in order to build mobile applications for both platforms, a company needs to have developers with expertise in both of these technologies. Most often those are different people.
There are other ways to build such applications.
One can build so-called mobile web applications. What is that? In a nutshell, the application uses a web browser behind the scene and delivers all content as a web page.
Yet another way would be to use technologies which allow building native applications by using a single tool. One builds an application using that tool and the application is able to run on both iOS and Android devices.
React Native and Flutter are examples of those tools.
With this article, I’m going to start a series of articles about mobile development using React Native. I would like to invite you to join my journey of learning React Native. We are going to cover the first steps and learn the technology on our way of building applications.
Let’s get started.
What is React Native?
React Native is a library (or a set of libraries) which allows implementingnative (that’s important) mobile applications using JavaScript. React Native applies the same architectural principles as React. Unlike React though, React Native does not rely on HTML5 and does implement mobile web applications. Using React Native we can build real native applications. The same application we can build using Swift/Objective-C for iOS and Java/Kotlin for Android.
Why we may want to use React Native
You can use React Native to build a mobile application and then publish it into App Store for iOS users and Google Play for Android users. It could be easier to support the development and maintenance. You can implement the functionality for both platforms at the same time.
If you are web-developer it could be much easier to try mobile development. You are familiar with JavaScript so you may not need to learn a new programming language. Especially if you are familiar with React. In that case, you are already familiar with the basic concepts of React Native.
Although, React Native is not without limitations. Like any other technology it has its pros and cons.
It can miss some features which are supported by native tools of iOS and Android platforms. For example, it may require some time to add support of fresh features of iOS or Android.
When you hit such limitations, it’s possible to implement some native pieces of functionality using a specific platform. That means you can use React Native for some parts of your application, and use native features for other parts.
One may think that React Native is just a toy and nobody will use it for production code. That’s not quite true.
There is a bunch of companies who are using React Native in their applications. That page contains some examples of these companies as well as links to some articles describing their stories and how does React Native work for them.
Of course, there are companies who decided not to proceed with React Native. For example, Airbnb engineers published a series of blog posts about that. They described their experience with React Native. Those articles are highly recommended to read.
You can scan or read through all those links above to get inspiration and decide if React Native is for you.
Create the first app
Now, when we understand what is React Native let’s proceed and implement our first “Hello World” application.
Before we start we need to configure our local environment. First, we need “Node.js” to be installed in our system. You can find instructions on the official web page for your operating system.
For example, for macOS, you can use Homebrew to install it.
It’s simply as running brew install node in your terminal.
Once you have done it, we are ready to proceed.
Using Expo
One way to create React Native applications is to use Expo toolchain. Using Expo we can create applications without the need for configuring native tools such as Xcode or Android Studio.
To install the Expo CLI library, run:
→ npm install -g expo-cli
Once the installation is finished we can create and run our application.
→ expo init ExpoHelloWorld
→ cd ExpoHelloWorld
→ expo start
As the next step, you need to install Expo app on your phone, then follow the on-screen instructions to get a link or scan QR code to run the application on your phone.
Using React Native CLI
Another way of creating a React Native application is to use React Native CLI tool. In that case, we can skip the Expo, but we would need to configure Xcode or Android Studio to run the application on one of these simulators.
First, we need to install react-native-cli itself.
→ npm install -g react-native-cli
Then we are ready to create an application.
→ react-native init HelloWorld
Once the process is finished, we can see the following instructions on how to run the application.
To run your app on iOS:
   cd HelloWorld
   react-native run-ios
   - or -
   Open ios/HelloWorld.xcodeproj in Xcode
   Hit the Run button
To run your app on Android:
   cd HelloWorld
   Have an Android emulator running (quickest way to get started), or a device connected
   react-native run-android
If we want to run the application on iOS simulator we need to type use run-ios command.
→ cd HelloWorld
→ react-native run-ios
The command launches iOS simulator and opens the application.
The first start of the application on a simulator takes several minutes. You can probably have a cup of coffee during that time.
Once it’s done, you can see your application running.
Now, let’s try to run the application on Android simulator.
Unlike the iOS simulator, Android simulator does not launch automatically and we need to launch it manually first.
The instructions above mention that as well:
Have an Android emulator running (quickest way to get started), or a device connected
I didn’t have an Android device around, so I need to configure an Android simulator.
To configure Android Studio I was following those steps. Once I installed everything, I created a Hello World Android application and ran it. It launches an Android simulator. Then, I closed the app but kept the simulator running.
I think the process is much simpler if you have an Android phone. If you know an easier way to run an Android simulator, please let me know in the comments below.
Now, we can run the following command to launch the application.
→ react-native run-android
And it works.
Windows and Linux
If you are using Windows or Linux machine you are able to run the only Android simulator. To try iOS apps you would need a real device or using Expo to try it out.
Ejecting
There is one option of React Native apps worth to mention. It’s ejecting.
Once we create an application using Expo CLI or React Native CLI we are able to use eject option to create Xcode and Android Studio projects for our app.
If we need to implement custom native functionality, that’s the way to go.
Use one of the following commands from the project directory.
→ expo eject --help
→ react-native eject --help
That will create a separate folder for Xcode or Android Studio projects. Then we can open the project using one of these tools and run the application from there.
Code walkthrough
So, we have figured out how to create and run React Native applications.
Now, let’s take a couple of minutes and walk through the code react-native init has created for us.
The heart of the application is located in the index.js file of our project.
Let’s walk from top to bottom.
import {AppRegistry} from 'react-native';
import App from './App';
import {name as appName} from './app.json';

AppRegistry.registerComponent(appName, () => App);
First, it imports the AppRegistry the entry point of running React Native application.
Then it imports the App component and the application name.
As the last step, it registers the component which makes the application runnable.
Now let’s move to the App component itself located in the App.js file.
import React, {Component} from 'react';
import {Platform, StyleSheet, Text, View} from 'react-native';
First two lines import some modules and components we are going to use.
const instructions = Platform.select({
  ios: 'Press Cmd+R to reload,\n' + 'Cmd+D or shake for dev menu',
  android:
    'Double tap R on your keyboard to reload,\n' +
    'Shake or press menu button for dev menu',
});
The Platform allows us to add different behavior for different platforms.
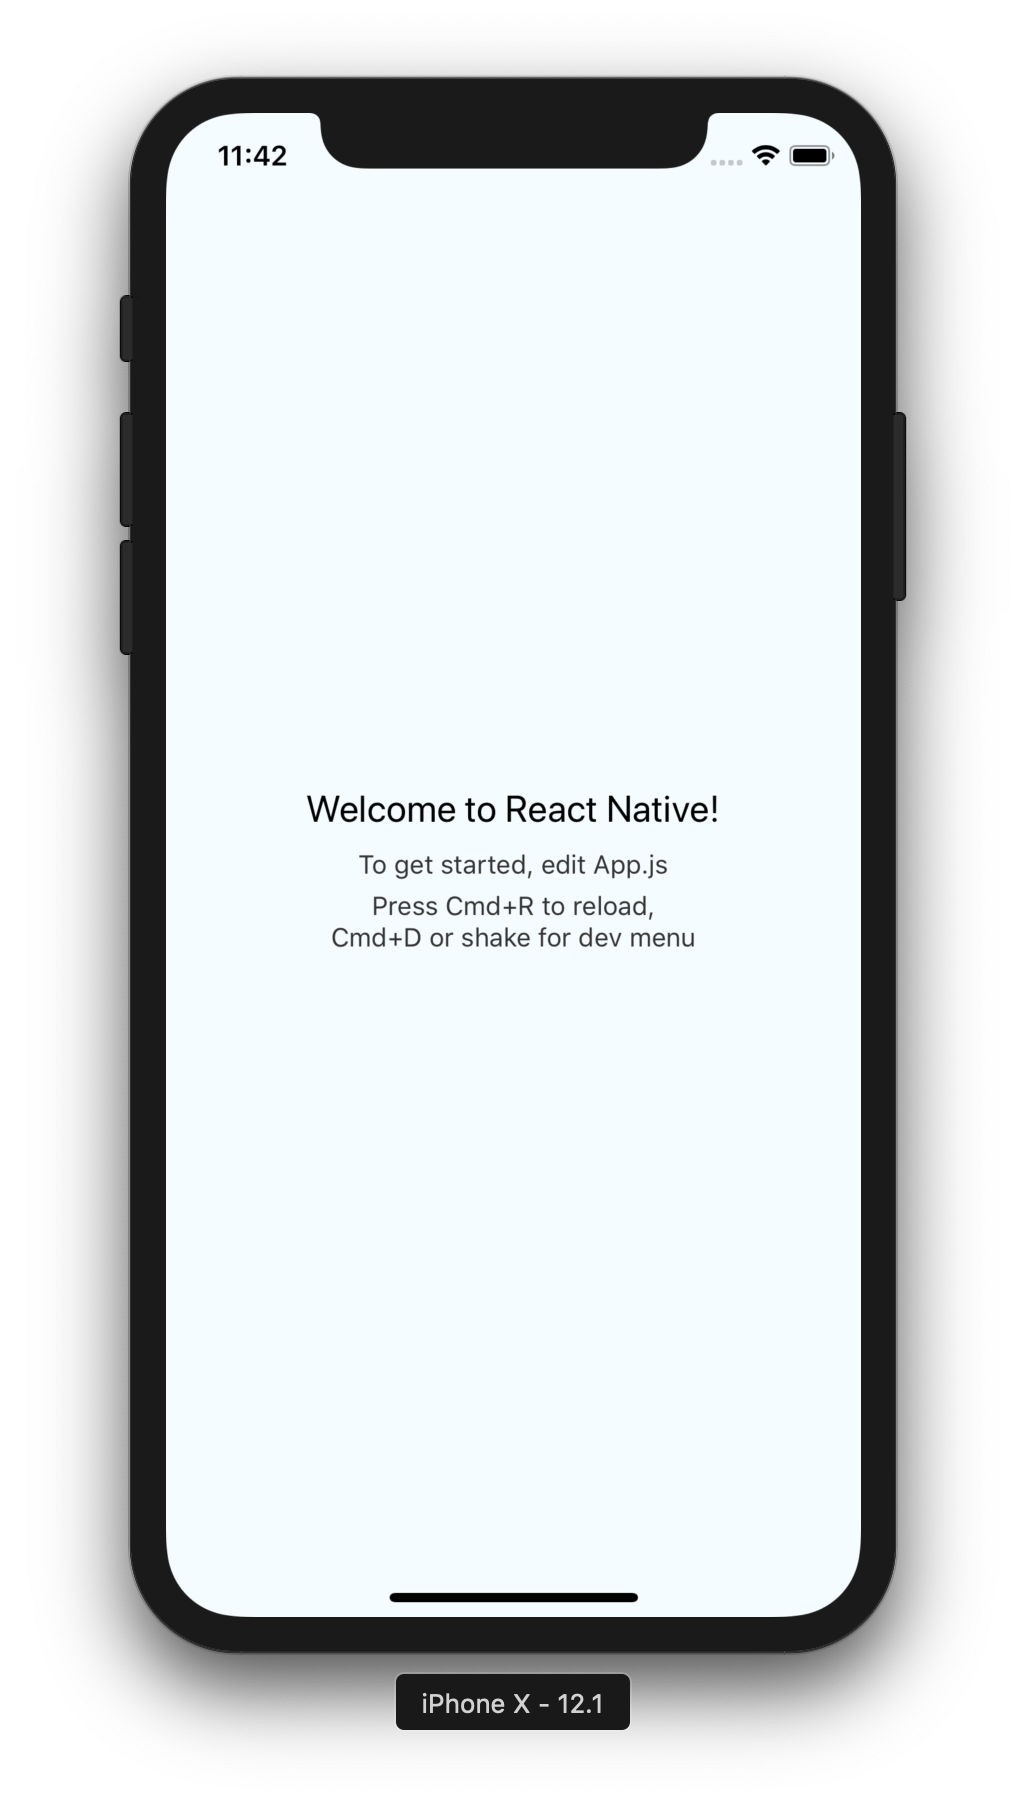
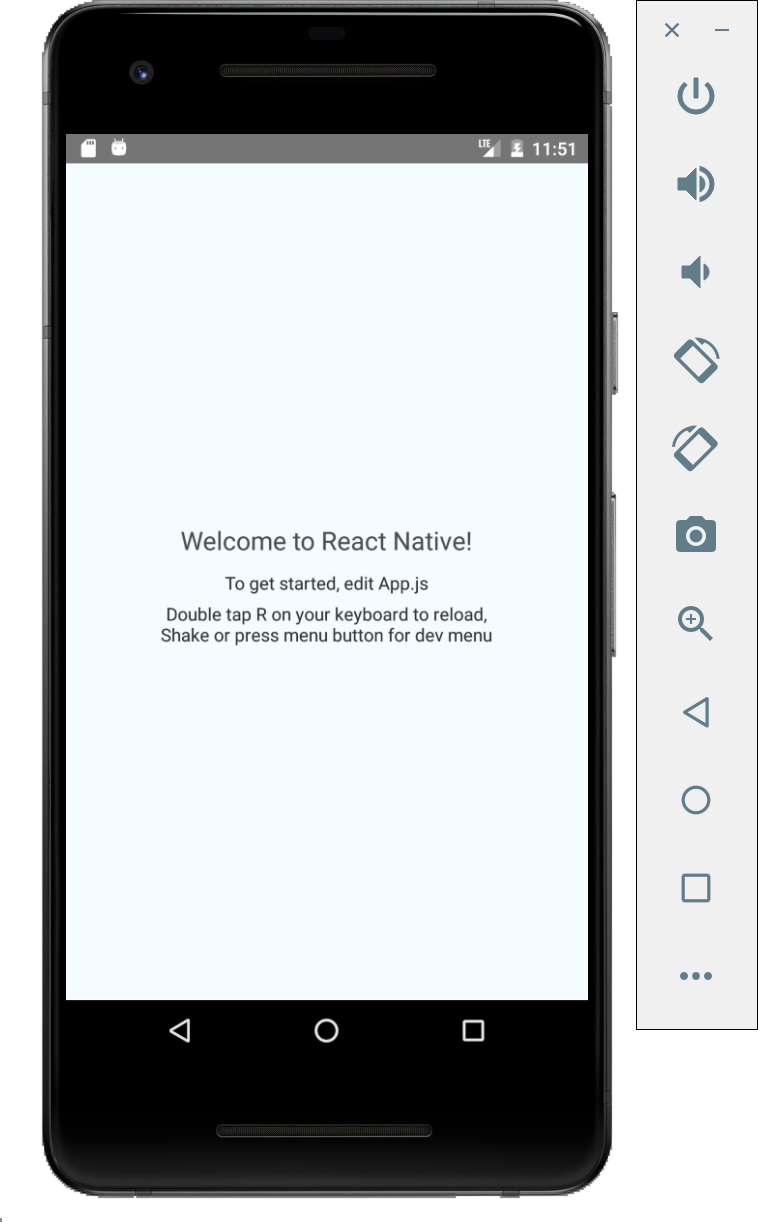
As you can see on screenshots above the application provides different instructions for iOS and Android users.
type Props = {};
export default class App extends Component<Props> {
  render() {
    return (
      <View style={styles.container}>
        <Text style={styles.welcome}>Welcome to React Native!</Text>
        <Text style={styles.instructions}>To get started, edit App.js</Text>
        <Text style={styles.instructions}>{instructions}</Text>
      </View>
    );
  }
}
In that part of the code, the application creates the App component.
The component implements render function which React uses to render the component on the screen.
The component consists of a View element and the three lines of text inside.
You can think of View as the similar to HTML’s div tag. It wraps other elements around.
Every element in that example has its styles. Here is how they are described.
const styles = StyleSheet.create({
  container: {
    flex: 1,
    justifyContent: 'center',
    alignItems: 'center',
    backgroundColor: '#F5FCFF',
  },
  welcome: {
    fontSize: 20,
    textAlign: 'center',
    margin: 10,
  },
  instructions: {
    textAlign: 'center',
    color: '#333333',
    marginBottom: 5,
  },
});
There is no such thing as CSS in mobile development, thus the StyleSheet module provides us similar abstraction.
First, we have a container style, the View component uses it. It renders the children in the centre of the screen.
Then we have a welcome style used by the first line of text and has a bigger font.
The instructions has its own styles.
If you are familiar with React you can notice all those parts are quite similar.
Wrapping up
That’s pretty much it. We have just made our first steps in React Native. We learned what is React Native and why we may want to use it. We created a “Hello World” application using Expo and React Native CLI. Now we know how to run applications on real devices and simulators.
In the following articles, we will go deeper into learning React Native.
See you next time.