
Sooner or later we need to get a custom input from a user. In that case, we need to render one or several fields and allow the user to provide us with the data. Then, we need to process that data.
Today I would like to see how can we implement the simplest possible input form. We are going to ask the user’s name and save it.
As a playground, I would use a mobile application we’ve been started to build in the previous articles.
In that application, we have a settings screen which is blank at the moment. We are going to add items in there.
Here is the source of the current implementation of that screen.
// src/screens/SettingsScreen.js
import React, { Component } from 'react';
import { Button, StyleSheet, Text, View } from 'react-native';

export default class SettingsScreen extends React.Component {
  render() {
    return (
      <View style={styles.container}>
        <View>
          <Text style={styles.header}>Settings</Text>
        </View>
      </View>
    );
  }
}

const styles = StyleSheet.create({
  container: {
    flex: 1,
    paddingTop: 45,
    backgroundColor: '#F5FCFF',
  },
  header: {
    fontSize: 25,
    textAlign: 'center',
    margin: 10,
    fontWeight: 'bold'
  }
});

Let’s start by rendering a text input on the screen.
TextInput
The TextInput is a basic element which allows users to input some text.
Right next to our “Settings” header, let’s add the following code.
<ScrollView>
  <View style={styles.inputContainer}>
    <TextInput
      style={styles.textInput}
      placeholder="Your name"
      maxLength={20}
    />
  </View>
</ScrollView>
We are going to use ScrollView as a container for our future input components.
That will make a content scrollable, in case the form gets bigger than a screen.
To learn more about ScrollView you can review the previous article article.
Inside the ScrollView we use a View component. It will play a role of wrapper around our form inputs.
We will be able to specify the common styles for all the input components, such as padding between them etc.
The container contains a TextInput component to capture the user’s input.
We also provide a placeholder text and maximum text length properties.
To make it work, we need to import TextInput and ScrollView at the top of the file.
import {
  // ...
  ScrollView,
  TextInput
} from 'react-native';
Currently, the input has no styles. Let’s add a bunch of them into the existing StyleSheet.create.
inputContainer: {
  paddingTop: 15
},
textInput: {
  borderColor: '#CCCCCC',
  borderTopWidth: 1,
  borderBottomWidth: 1,
  height: 50,
  fontSize: 25,
  paddingLeft: 20,
  paddingRight: 20
}
The result of those changes you can see in the screenshot below.

Before we move to the implementation of the submit button, let’s do a small improvement.
Once a text input gets focused, the mobile application displays a keyboard to enter data into the input. When the keyboard is shown, it stays open and the user cannot get rid of it. Sometimes, that can be annoying.
The user should be able to hide a keyboard when it’s not needed. For example, we can dismiss the keyboard when the user clicks somewhere outside the text input.
How do we know that the user clicks outside? When the user clicks outside, the input field will lose its focus.
An onBlur callback can help us in that case.
To hide a keyboard we need to call the dismiss() function of the Keyboard module.
import {
  // ...
  Keyboard
} from 'react-native';

// ...

<TextInput
  style={styles.textInput}
  placeholder="Your name"
  maxLength={20}
  onBlur={Keyboard.dismiss}
/>
Now, we can hide a keyboard every time we don’t need it.
Now, we have a text input. The user can provide a name. As the next step, the user should be able to save the name. We are going to save the value when the user taps on a “Save” button.
You are probably familiar with a Button component.
We were using it in previous articles.
The issue with the button component is that it doesn’t provide too much options to customize itself.
When we want buttons to look different, we can build our custom buttons using a TouchableOpacity component.
TouchableOpacity
By using a TouchableOpacity component, we can define an area with custom children.
Let’s implement our “Save” button using that approach.
As usual, we need to import the component we are about to use.
import {
  // ...
  TouchableOpacity
} from 'react-native';
Then we add our future button right next to the text input
<View style={styles.inputContainer}>
  <TouchableOpacity
    style={styles.saveButton}
  >
    <Text style={styles.saveButtonText}>Save</Text>
  </TouchableOpacity>
</View>
and its styles
saveButton: {
  borderWidth: 1,
  borderColor: '#007BFF',
  backgroundColor: '#007BFF',
  padding: 15,
  margin: 5
},
saveButtonText: {
  color: '#FFFFFF',
  fontSize: 20,
  textAlign: 'center'
}
That’s how the button should look.
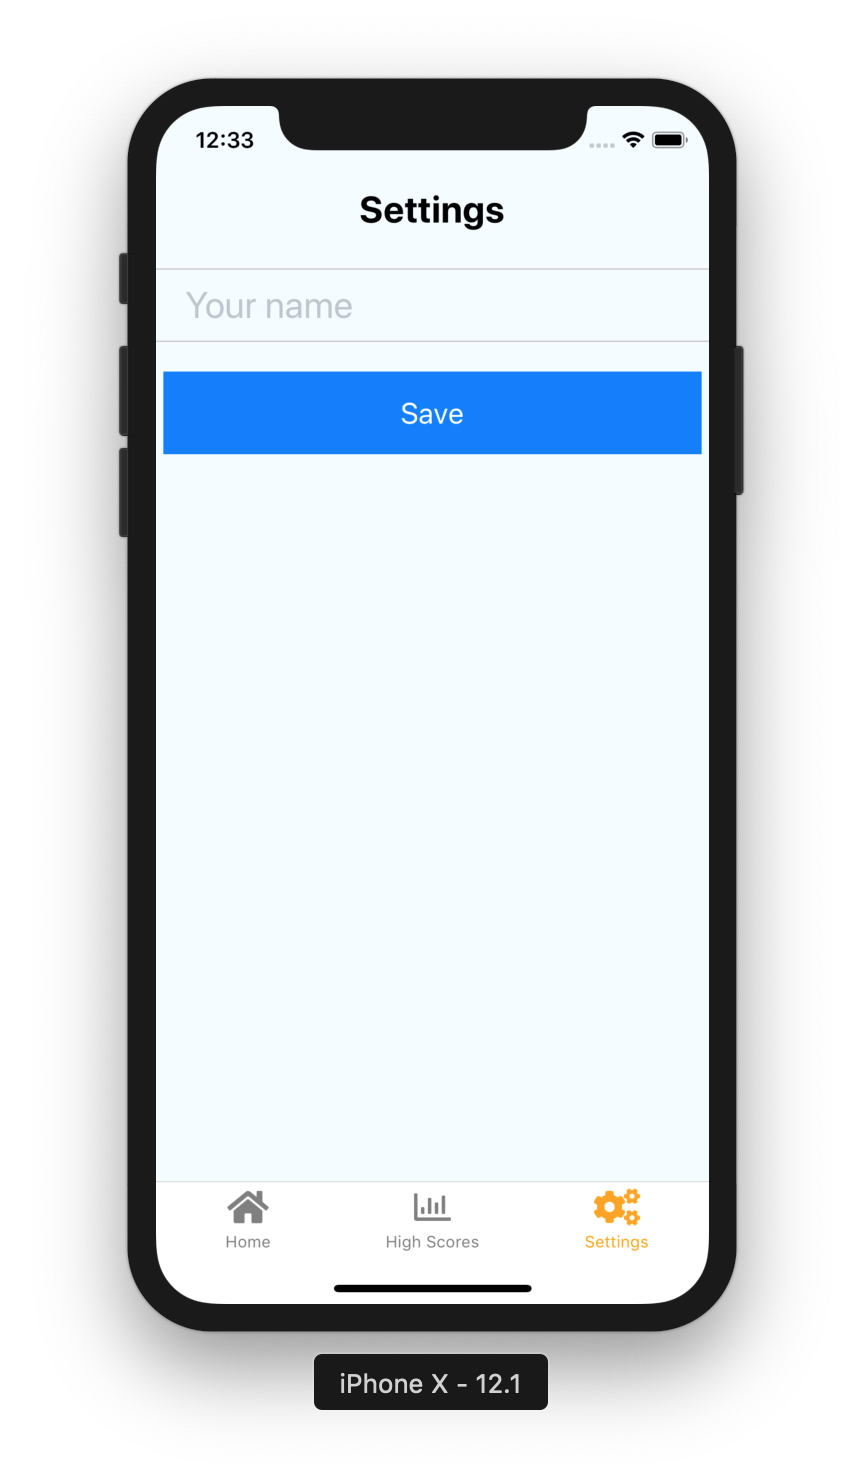
We have a button and a text input. Now we need to grab the value of text input and save it when the users click the button.
In HTML, form inputs maintain their own state.
React components need to keep that state in the state property and update it using setState().
Before we can grab the input’s value, we need to store it in the state property.
We can do that by updating the state every time the user changes the value of that input.
Let’s update our TextInput to read the value from the state and call onChangeText callback.
<TextInput
  style={styles.textInput}
  placeholder="Your name"
  maxLength={20}
  onBlur={Keyboard.dismiss}
  value={this.state.name}
  onChangeText={this.handleNameChange}
/>
Then, we need to define the callback function.
handleNameChange(name) {
  this.setState({ name });
}
Then, define the constructor with the initial state and bind this context to the handleNameChange() function.
constructor(props) {
  super(props);

  this.state = { name: '' }

  this.handleNameChange = this.handleNameChange.bind(this);
}
After these changes, our input will update its state every time we change the text inside.
Now, we know the value of the text input, let’s grab it and store when the user clicks on the button.
Add an onPress callback.
<TouchableOpacity
  style={styles.saveButton}
  onPress={this.handleSubmit}
>
  <Text style={styles.saveButtonText}>Save</Text>
</TouchableOpacity>
Then, bind the this context in the constructor body
constructor(props) {
  // ...
  this.handleSubmit = this.handleSubmit.bind(this);
}
and define the callback itself.
handleSubmit() {
  saveSettings(this.state);
}
What we wanna do, is to grab the state and persist it in the local storage.
When the user submits the form, we call a saveSettings function and pass the current state as an argument.
The saveSettings function doesn’t exist yet.
Let’s define it.
Create a src/storage/settingsStorage.js file with the following content.
import { AsyncStorage } from 'react-native';

const STORAGE_KEY = 'SETTINGS';

export const saveSettings = (settings) => {
  AsyncStorage.setItem(STORAGE_KEY, JSON.stringify(settings));
}
If you want to get more familiar with the AsyncStorage you can review the “Local data persistence using AsyncStorage” article.
That function receives an object and store the serialized version of it on a mobile device.
To make it work, we need to import the saveSettings function from the settingsStorage file.
import { saveSettings } from '../storage/settingsStorage';
Now, every time the user touches the button, we are updating the local storage with the user’s name.
That implementation wouldn’t be complete without loading stored data.
Let’s add another function to the settingsStorage.js file.
const DEFAULT_SETTINGS = {
  name: ''
};

export const loadSettings = async () => {
  try {
    let settings = await AsyncStorage.getItem(STORAGE_KEY);

    if (settings === null) { return DEFAULT_SETTINGS; }

    return JSON.parse(settings);
  } catch (error) {
    console.log('Error loading settings', error);
  }
}
This time, we are loading the settings data. We also return empty settings when data doesn’t exist.
Now, back to the src/screens/SettingsScreen.js file. Let’s import that function
import {
  loadSettings,
  saveSettings
} from '../storage/settingsStorage';
and call it in the componentDidMount() callback, so it will update the state of the component:
async componentDidMount() {
  const initialState = await loadSettings();

  this.setState(initialState);
}
Once we did all these changes, our settings page loads the data from the local storage and saves it back when we click the “Save” button.
Wrapping up
We’ve just covered the fundamentals of creating a simple form in React Native. Of course, there is a room for improvement. For the sake of example, we described the form with the single input. Usually, input forms contain more fields as well as input validation. We will cover these parts in one of the next articles.
You can find the complete implementation on the GitHub page of the project.
See you next time.