
In the previous article we have created our first Alexa skill. We have implemented all the steps manually. We have created a skill from the web interface. We have configured the interaction model. Then we have created a lambda function with the simplest implementation of the skill. And then we have linked the lambda function and the skill together, so they can work as a one.
All of these steps can be optimized and improved. That’s why this time I would like to cover a way to create an Alexa skill using a command line and a code editor of your choice.
Although we would need to use AWS web interface to create a user and policy, the rest would be done via command line interface.
Let’s get started.
As usual, before we move to a skill itself there is some other work we need to accomplish.
Before the start
We would need to have all both AWS free tier account and Amazon developer account as well as Node.js 6.10+.
On top of that, would need to install “AWS CLI” and “ASK CLI” tools. We would use “ASK CLI” in our examples, which uses “AWS CLI” under the hood.
AWS CLI
To install AWS CLI follow the instructions from the documentation page. Once it’s done we can move to the configuration of the tool. First, we need to create a user with the proper rights to create and manage lambda functions and roles. We are going to use that user to deploy the lambda functions.
The process may look a little bit overcomplicated, but please bear with me.
So, we need to create a permission policy, then create a user and assign that policy to him.
Create a policy
As I’ve mentioned above, we need a policy with the bunch of permissions. Let’s create it.
- In AWS Console find and navigate to IAM Service
- Click “Policies” in the left side menu and then “Create policy” button
- Click “Choose a service” then find and select “IAM”
- For “Actions” find and select “CreateRole”, “AttachRolePolicy” and “PassRole” permissions
- Then choose “All resources” in the resources section
- Click “Add additional permissions” link below
- Find and select “Lambda” for a service and choose “CreateFunction”, “AddPermission”, “GetFunction” and “UpdateFunctionCode” for actions.
- Click “Add additional permissions” link again
- Find and select “CloudWatch Logs” for a service and choose “FilterLogEvents” for actions
- Then choose “All resources” in the resources section
- Click “Review policy” button below
- Set the policy name to “alexa-deploy-policy” (or you can choose any other name) and then “Create policy”
Create a user
Once our policy is ready we can create a user and assign that policy to that user.
- In AWS Console find and navigate to IAM Service
- Click “Users” in the left side menu and then “Add user” button
- Fill in the “User name” field with the name you want. I would use “alexa-deploy”
- Check the “Programmatic access” checkbox below and click “Next” button.
- On the next page click “Create group” button
- Set the group name to (for example) “alexa-deploy”
- In the filter policies search and attach our “alexa-deploy-policy”
- On the following page, click “Next” and then “Create user” buttons.
On that step, you should see the success page with user credentials. We need them for the next step.
Configure AWS CLI
In your terminal window run the aws configure command and provide the required settings.
→ aws configure
AWS Access Key ID [None]: <YOUR-KEY-ID-HERE>
AWS Secret Access Key [None]: <YOUR-KEY-SECRET-HERE>
Default region name [None]: us-east-1
Default output format [None]: json
That should enough for AWS CLI. Next, we need to install and configure ASK CLI tool
ASK CLI
ASK CLI is a Node.js package, so to install it we need to run the following command in the terminal window.
→ npm install -g ask-cli
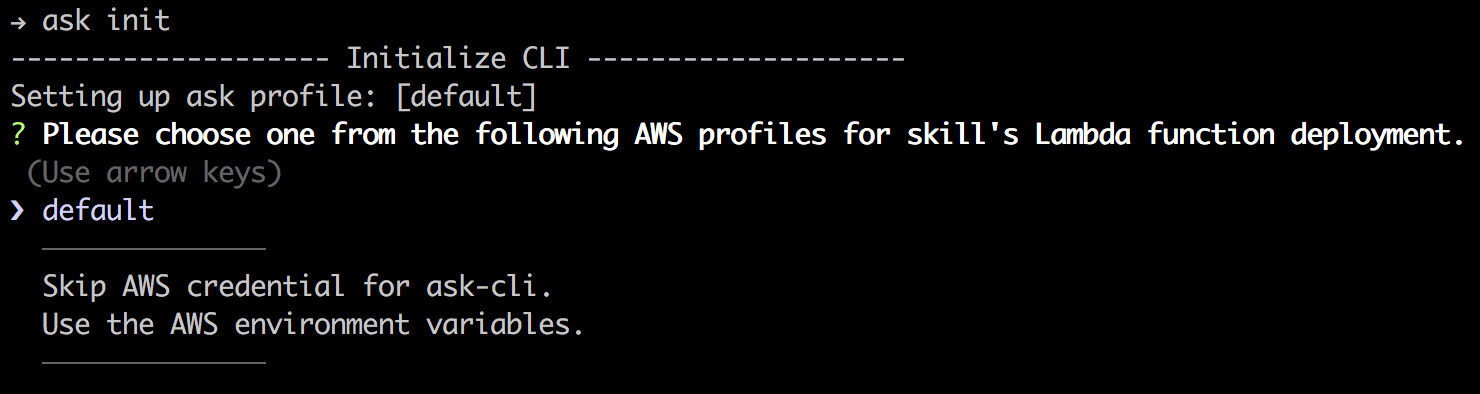
Then, we need to configure the tool. Run ask init to do that.
→ ask init
First, it would ask for you for the name of the profile to create. And “default” profile is by default.
Then the command will (by default) open a browser and ask you to sign in into Amazon Developer account (don’t mix it with the AWS Console).
Once it’s done the tool saves all the configuration in the ~/.ask/cli_config file.
If you want to re-init it for some reasons you may delete the file and start over.
Create new skill
OK. Out tools are up and ready, let’s move in and bootstrap our still using ASK CLI.
→ ask new -n what-did-i-learn --lambda-name alexa-skill-what-did-i-learn
New project for Alexa skill created.
That command creates a project directory “what-did-i-learn” with the all required files. We have also configured the name of a lambda function to be “alexa-skill-what-did-i-learn”.
The directory contains following files:
skill.json- The configuration of the skillmodels/en-US.json- An interaction model of the skill for en-US locale.lambda/custom/index.js- A core implementation of the skilllambda/custom/package.json- The npm package file.ask/config- deploy settings configuration file
Configure a skill
Now let’s try to configure our skill step-by-step.
We start from the .ask/config file.
We have the following value for endpoint.url param in that file:
ask-custom-alexa-skill-what-did-i-learn-default
It seems to me it is too verbose. I would rather change it for something shorter, like:
alexa-skill-what-did-i-learn
That change is not mandatory and you can keep the original version of it.
Next, let’s move on to the skill.json file.
Change “summary” from Sample Short Description to The hello world Alexa skill.
Change “examplePhrases” from:
"examplePhrases": [
  "Alexa open hello world",
  "Alexa tell hello world hello",
  "Alexa ask hello world say hello"
],
to
"examplePhrases": [
  "Alexa open my second skill",
  "Alexa ask my second skill what did I learn",
  "Alexa ask my second skill Did I learn something"
],
Change “description” from Sample Full Description to My second Alexa skill which tells a stuff I've learned today.
That information would be displayed on the skill’s page in the Skills Store. It should help people to understand what is your skill about and how to start with it.
Let’s keep the rest of the settings as it is.
The next file we are going to update is models/en-US.json.
We need to update “invocationName” to be my second skill. That is how users would trigger the skill.
Then update HelloWorldIntent to WhatDidILearnIntent. We will use that intend in our code.
And define the “samples” to be:
"samples": [
  "What did I learn",
  "What have I learned",
  "Did I learn something"
]
In the lambda/custom/package.json file update “name” to be what-did-i-learn.
That is just the name of npm package for our skill.
As the last step of these changes, we need to update the lambda/custom/index.js file.
First, we need to replace all occurrences of HelloWorldIntent with WhatDidILearnIntent.
Now, inside the handle function of WhatDidILearnIntentHandler we need to change the value of the speechText constant to be:
'Congratulations! You have learned how to build your second Alexa skill.'.
In the handle function of LaunchRequestHandler let’s update speechText value to be something like: 'Welcome! You can ask "what did I learn".'
Inside the HelpIntentHandler replace 'You can say hello to me!' with 'You can say what did I learn to me!'.
Almost in every handler, we have the following line:
.withSimpleCard('Hello World', speechText)
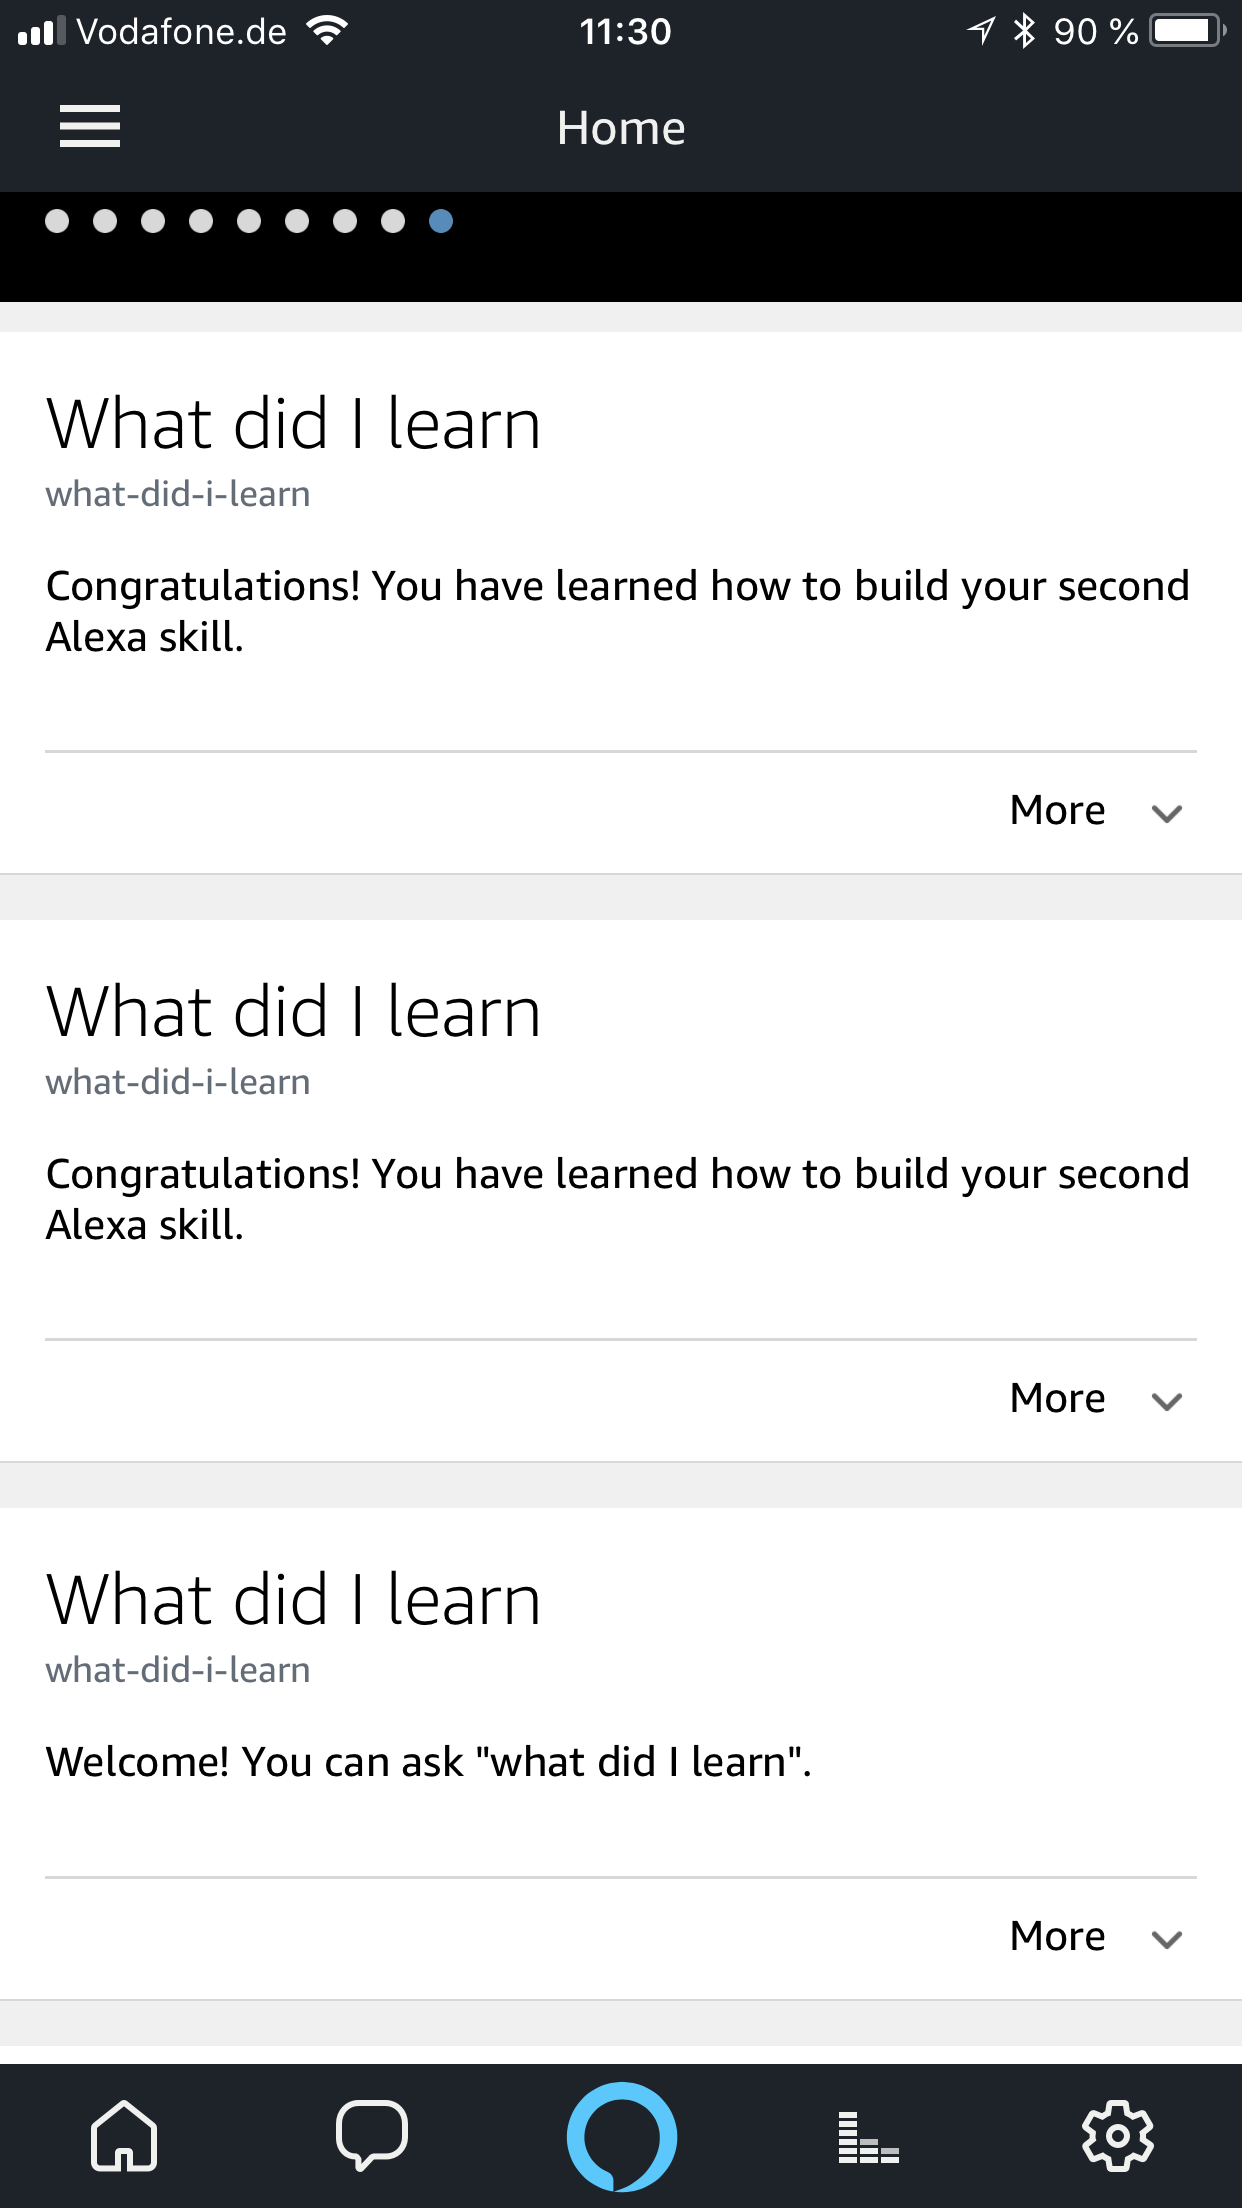
By using that piece of functionality our skill will be able to render a small card with the same information Alexa just said to us. You can see that information in the “Amazon Alexa” app on your phone. Also on Echo Spot and Echo Show devices in case you are using them.
So, let’s change all the occurrences of that line to be:
.withSimpleCard('What did I learn', speechText)
That’s it.
Understanding skill implementation
Now, before we move to deploy of the skill. Let’s make a small detour and figure out what does the implementation of the skill do.
If you read my previous article about building Hello World skill, you can notice that the implementation of those skills is different. That is because the last example was build using Alexa SDK v1, and current skill uses Alexa SDK v2.
So let’s walk in small steps now.
On the very top of the file we are importing SDK and assigning it Alexa constant for later use:
const Alexa = require('ask-sdk-core');
Fast forward to the very bottom of the file, we can see the following piece of the code:
const skillBuilder = Alexa.SkillBuilders.custom();

exports.handler = skillBuilder
  .addRequestHandlers(
    LaunchRequestHandler,
    WhatDidILearnIntentHandler,
    HelpIntentHandler,
    CancelAndStopIntentHandler,
    SessionEndedRequestHandler
  )
  .addErrorHandlers(ErrorHandler)
  .lambda();
Here we define a new constant skillBuiler from the custom builder of Alexa SDK.
Then we describe the request handlers by calling addRequestHandlers.
You can see there are LaunchRequestHandler our custom WhatDidILearnIntentHandler and a bunch of built-in handlers.
We will get back to them in a bit.
Then we describe the error handlers by calling addErrorHanders.
And finally, we call lambda() to execute our lambda function.
Now the handlers.
Let’s take WhatDidILearnIntentHandler and an example:
const WhatDidILearnIntentHandler = {
  canHandle(handlerInput) {
    return handlerInput.requestEnvelope.request.type === 'IntentRequest'
      && handlerInput.requestEnvelope.request.intent.name === 'WhatDidILearnIntent';
  },
  handle(handlerInput) {
    const speechText = 'Congratulations! You have learned how to build your second Alexa skill.'

    return handlerInput.responseBuilder
      .speak(speechText)
      .withSimpleCard('What did I learn', speechText)
      .getResponse();
  },
};
Every handler represents a JavaScript object with two important functions canHandle and handle.
The canHandle function should figure out if the current handle should take care about current user request.
In our case, we would process the request for the intent named “WhatDidILearnIntent”.
The handle function is the implementation of that intent. Here we define a text we want to say back to a user.
Then we “say” that text, duplicate that response on the small card in the Amazon Alexa app and we are done.
The skill would finish the job.
All the other intent handlers are quite similar. For example LaunchRequestHandler and HelpIntentHandler use reprompt(speechText) in addition.
That gives the command to Alexa to wait for a response from a user.
So, now I think we understand how the implementation of the skill works and we are ready to deploy and test the skill.
Deploy the skill
To deploy the skill run the following command from the directory of that skill.
→ ask deploy
That command will take care of everything required to create a skill, create a lambda function and link them together.
It also updates .ask/config file with the skill ID and lambda function information.
So next time the tool would know which skill and which lambda function to update.
Because of that, we can use the same command to redeploy our skill.
If we change only the implementation inside index.js we can deploy only lambda function by targeting it:
→ ask deploy -t lambda
Then deploy is finished you can use your skill from your device or simulator.
Remember we have changed withSimpleCard line? Here is how it looks on the phone
Wrapping up
Ok, we are done. That is (again) looks like a complicated Hello World implementation of the skill. We have made so many steps before deploy. The bright side, that you would usually do it once. For new skills, you would have most that stuff ready. Then you create new skills and deploy them almost right away.
You may see, that approach is somehow easier and I think more preferable. You would be annoyed to update the lambda function by uploading the archive files every time.
The complete example of those changes you can find on the GitHub page.
See you next time.