
In the previous articles we have built a Hello World Alexa skill. As any other hello world programs, the skill does only one job. We can only ask a single question and receive the single answer back.
Although you can build skill using that kind of interaction with a user, sooner or later you will feel the need of getting some custom data from a user. For example, you may want to tell a number or a name of a city and behave differently based on the answer.
Let’s see how we can do that.
Slots
To capture a user’s input we need to use so-called slots in intent utterances.
To achieve that, we can use curly braces ({}) to provide a slot name.
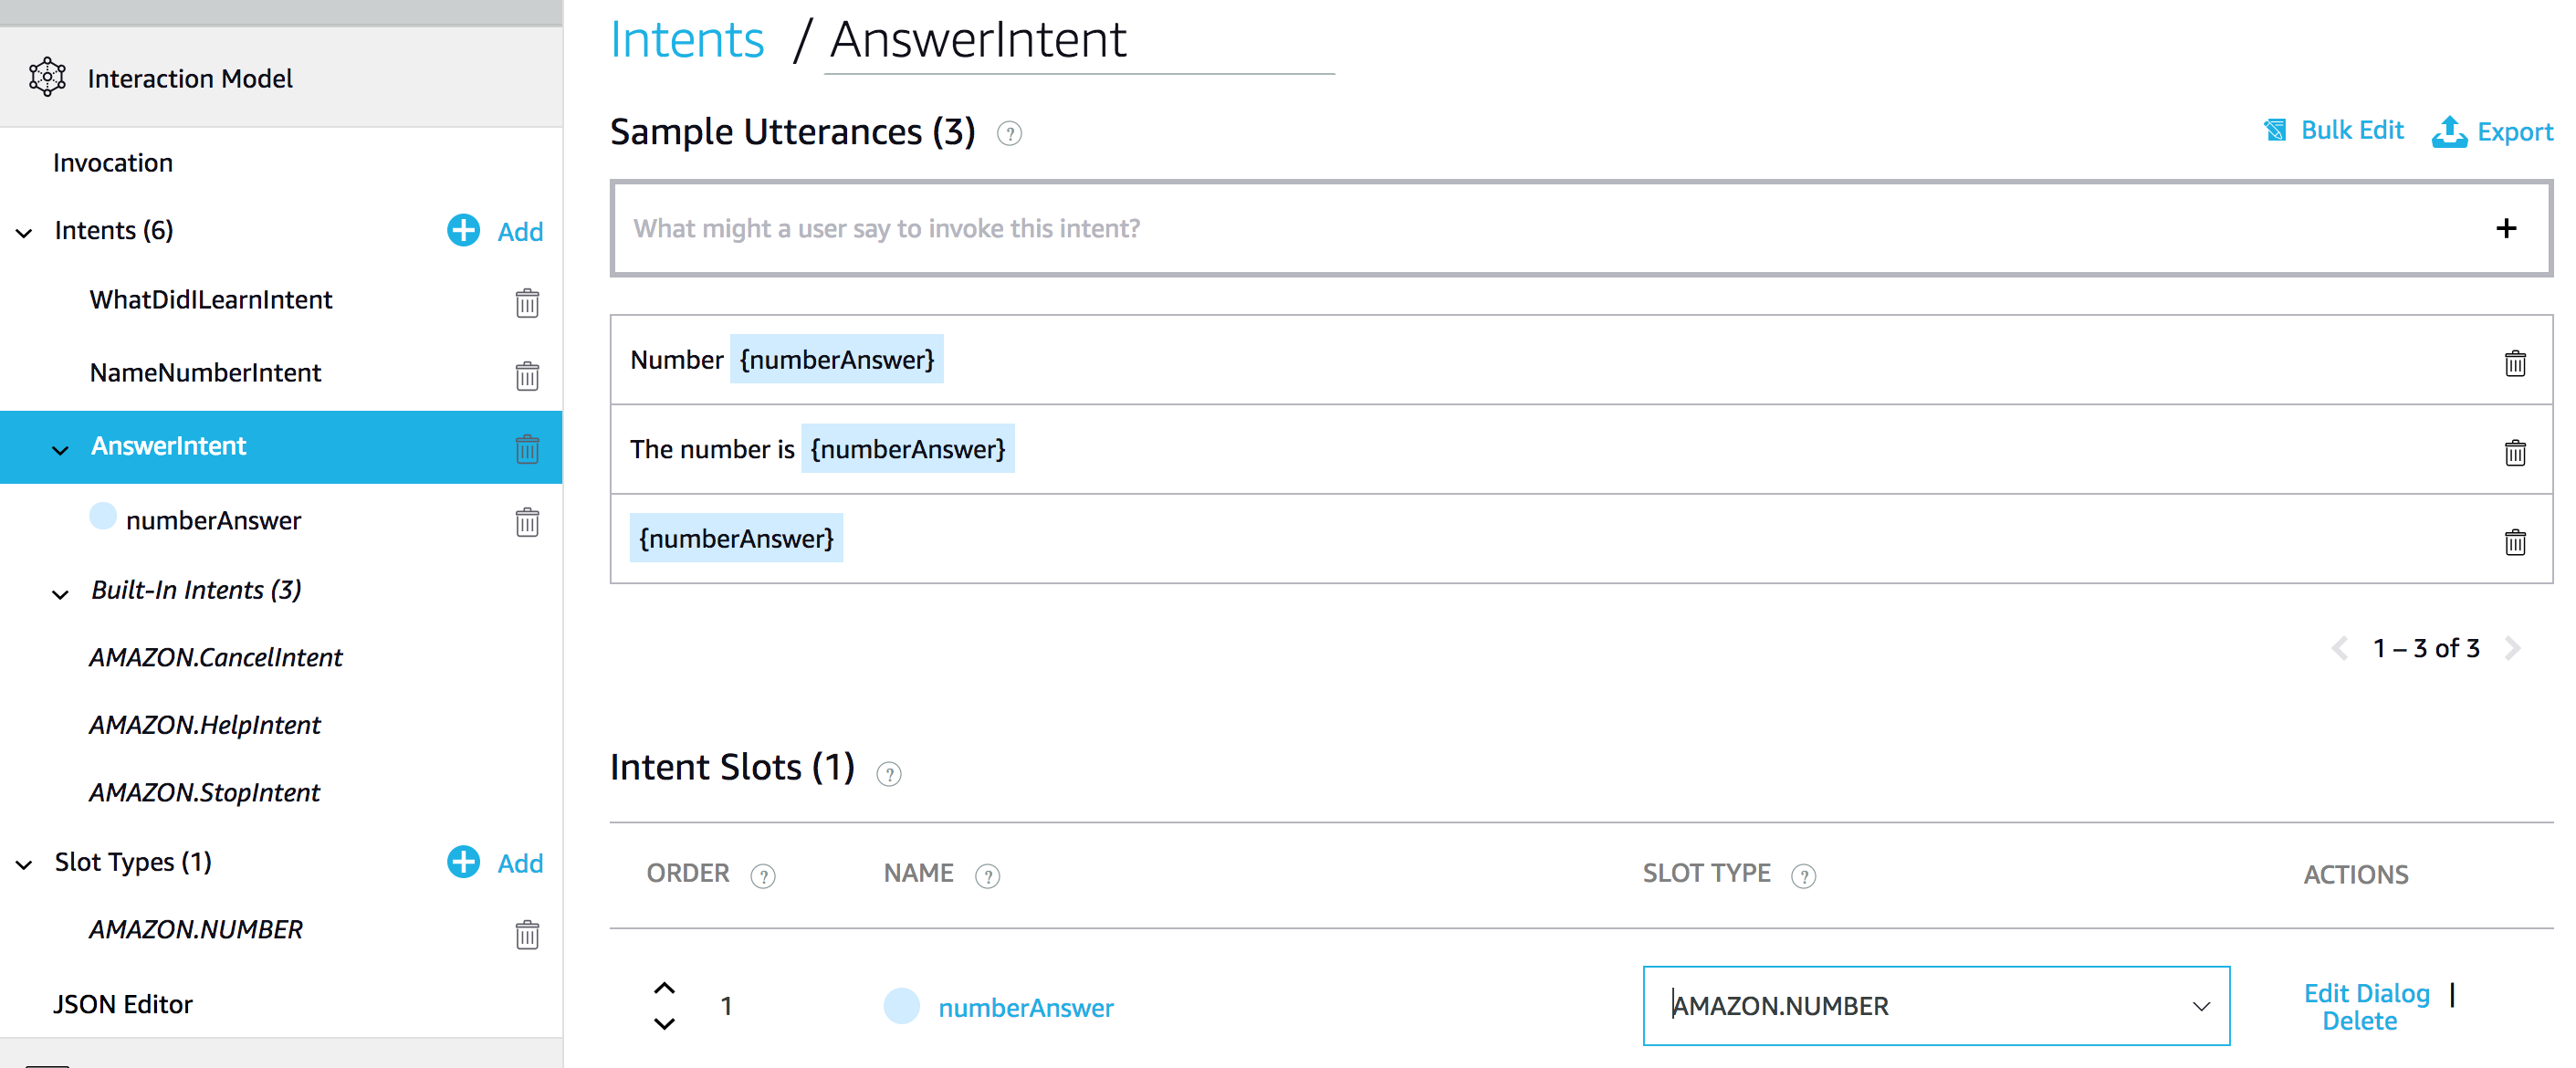
For example: We would like to ask a user to provide any number. So we define an “AnswerIntent” with the following utterances:
- Number
{numberAnswer} - The number is
{numberAnswer} {numberAnswer}
Now, if the user says “The number is five hundred” we would like to get the number and use it somehow in our code.
At that moment we have defined the slot. But we need also to choose a “Slot Type” for that slot. The slot type will help Alexa to understand that is user saying.
That slot type can be either custom or built-in.
Built-in slot types
In our example, we need a number, so there is an “AMAZON.NUMBER” slot type.
That is how the “AnswerIntent” looks in the skill builder.
Besides that type, the skill builder provides a vast amount of other types. The list of types is growing.
For example, there are slot types to work with dates and times. As well as some other interesting ones. There are slot types with a list of airports or animals.
We can use a built-in type and extend it with additional values.
Here is just a small portion of them.

Custom slot types
Let’s say you want to get a more specific response from your users, but there is no built-in slot type for these needs. Then you can build your own custom slot type and provide a list of possible values.
Go ahead and in the skill builder click to “Add” slot type link and choose a name for your custom slot.
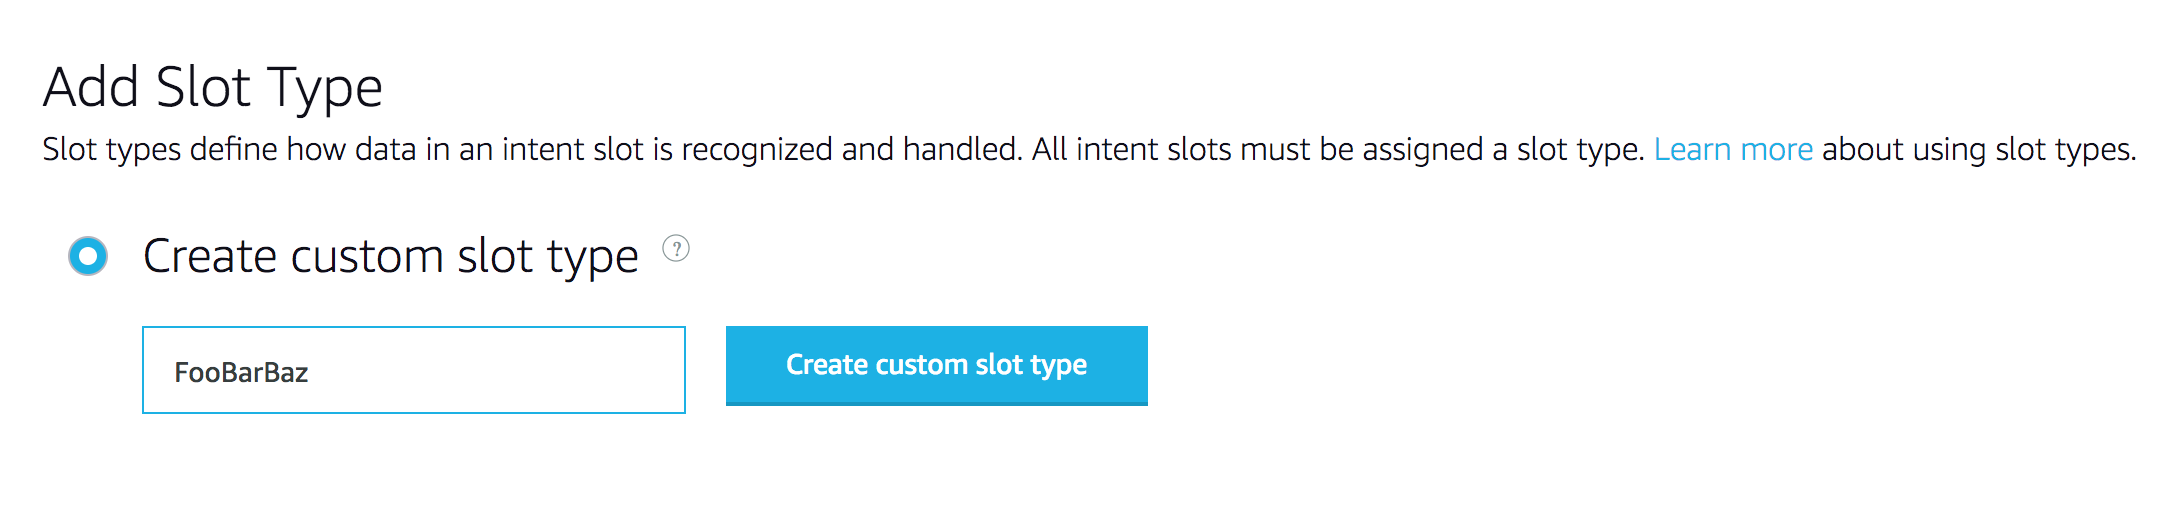
Then you can specify all the possible values for that type. Even add synonyms if you need.

After that, you are free to use the slot type in your slots. Create a new slot in utterance samples and attach the custom type.
Getting values from the slots
We have figured out how to define slots in the skill builder. The half of the job is done.
Now it’s time to access the response from our codebase.
We can achieve that in two steps.
At first, we need to tell Alexa to start listening to a user’s input.
To do that we need some intent handler with reprompt call in it.
const NameNumberIntentHandler = {
  canHandle(handlerInput) {
    return handlerInput.requestEnvelope.request.type === 'IntentRequest'
      && handlerInput.requestEnvelope.request.intent.name === 'NameNumberIntent';
  },
  handle(handlerInput) {
    const speechText = 'Ok. Tell me any number after a signal. Beep!'

    return handlerInput.responseBuilder
      .speak(speechText)
      .reprompt(speechText) // <--- Here is our reprompt
      .withSimpleCard('What did I learn', speechText)
      .getResponse();
  },
};
At this moment Alexa waits for the user’s input. If the user tells us something satisfying the sample utterances from “AnswerIntent” example above, Alexa would trigger “AnswerIntentHandler” where we can fetch a slot value.
The slots a live deep inside handlerInput.requestEnvelope.request.intent.slots object.
We can fetch the slot by the name slots['<name-of-the-slot>'] and then access the value slots['<name-of-the-slot>'].value.
Let’s see it in the example:
const AnswerIntentHandler = {
  canHandle(handlerInput) {
    return handlerInput.requestEnvelope.request.type === 'IntentRequest'
      && handlerInput.requestEnvelope.request.intent.name === 'AnswerIntent';
  },
  handle(handlerInput) {
    const slots = handlerInput.requestEnvelope.request.intent.slots;
    const number = slots['numberAnswer'].value;

    const speechText = `Your number is: ${number}.`

    return handlerInput.responseBuilder
      .speak(speechText)
      .withSimpleCard('What did I learn', speechText)
      .getResponse();
  },
};
Here we fetch the slots object to a slots constant.
Then we’ve got the value of numberAnswer slot.
That’s it. We’ve got it.
Now to demonstrate that Alexa understood a user correctly, we tell her to say the number back to the user.
That is how the dialog looks like.

Wrapping up
We have a new tool in the toolbelt. Now when we need to get some input from the user we can use slots for that. We have learned there are two kinds of slot types: custom and built-in. We can use both in order to build better Alexa skills.
You can find a complete example on GitHub.