
Last time we have learned how to capture input from the user. Using captured inputs we are able to handle communication with users from our skills.
But a skill does not always have a linear conversation. We may want to ask a question and behave differently based on the answer we’ve got. To do that, we need to keep some information in the “memory” of an Alexa skill.
To achieve that, Alexa Skill SDK provides us an ability to use Session Attributes.
Let’s see how we can use that.
To demonstrate that on example let’s implement “Toy Robot Simulator” as an Alexa skill.
Toy Robot Simulator
If you are not familiar with the Toy Robot problem here it is.
We have a table top with the size of 5 and 5 squares. We can place a toy robot on the table. The robot then would have its coordinates and a facing position. The facing direction could be “North”, “East”, “South” or “West”. Once the robot on the table we are able to move it using the “Move” command. It should move one step to the facing direction. We can also rotate it “left” and “right” changing facing direction. We can use the “Report” command to ask for the current Robot’s position. Also, the robot should not be able to fall from the table. To meet that requirement we should not move the robot if it is on the edge.
Skill implementation
At first, I will create a boilerplate skill to work on. I will create it using ASK CLI in the same way I’ve described in the Use ASK CLI to create and deploy Alexa Skills article. If you are not familiar with that you may want to follow those instructions.
At the end of this step, we will have a skill with the welcome message and ability to place the robot. Once we place it in the initial position, Alexa tells us about that and terminates the skill.
The PlaceIntent is responsible to handle the start of the simulation.
Here is how the implementation looks like:
const PlaceIntentHandler = {
  canHandle(handlerInput) {
    return handlerInput.requestEnvelope.request.type === 'IntentRequest'
      && handlerInput.requestEnvelope.request.intent.name === 'PlaceIntent';
  },
  handle(handlerInput) {
    const sessionAttributes = handlerInput.attributesManager.getSessionAttributes();
    const { position } = sessionAttributes;

    const speechText = 'The robot is in the initial position.';

    return handlerInput.responseBuilder
      .speak(speechText)
      .withSimpleCard(CARD_TITLE, speechText)
      .getResponse();
  },
};
That would be enough to start from here.
Placing the robot
Now, once we are placing the robot we need to actually put it in some place. That means we need to init the default position and facing direction.
Also, if the robot is already in the position, we want to notify the user about that.
To keep the position of the robot we can use the following structure:
position = {
  'direction': 'north',
  'x': 0,
  'y': 0
};
If we define the position of the robot as a usual constant, that value would be lost between intents. Thus, we need to properly store it into a session attributes.
How do we do that?
The handlerInput object contains an attributesManager.
Which in turn gives us getSessionAttributes and setSessionAttributes functions.
getSessionAttributes- as you may understand already, provides us the list of existing session attributessetSessionAttributes- allows us to update them.
Now, let’s extend out PlaceIntentHandler to retrieve the robot’s position.
Notify a user if the robot is in position already or set the robot in a default position.
As the last step, we need to update the session attributes.
const PlaceIntentHandler = {
  canHandle(handlerInput) {
    return handlerInput.requestEnvelope.request.type === 'IntentRequest'
      && handlerInput.requestEnvelope.request.intent.name === 'PlaceIntent';
  },
  handle(handlerInput) {
    const sessionAttributes = handlerInput.attributesManager.getSessionAttributes();
    const { position } = sessionAttributes;

    let speechText = 'The robot is already in the position.';

    if (typeof position === 'undefined') {
      speechText = 'The robot is in the initial position.';
      sessionAttributes.position = {
        'direction': 'north',
        'x': 0,
        'y': 0
      };
    }

    handlerInput.attributesManager.setSessionAttributes(sessionAttributes);

    return handlerInput.responseBuilder
      .speak(speechText)
      .reprompt(speechText)
      .withSimpleCard(CARD_TITLE, speechText)
      .getResponse();
  },
};
Now we have the robot in the position and the position is stored as a session attribute.
Let’s move on and implement ReportIntent to get the current position of the robot.
Get reports
First, we need to create an intent. We can update the models/en-US.json file to include:
{
  "name": "ReportIntent",
  "slots": [],
  "samples": [
    "Report",
    "Where is the robot",
    "Where am I"
  ]
}
Then we need to add ReportIntentHandler into addRequestHandlers:
addRequestHandlers(
  // ...
  ReportIntentHandler,
  // ...
)
Then we need to define ReportIntentHandler itself:
const ReportIntentHandler = {
  canHandle(handlerInput) {
    return handlerInput.requestEnvelope.request.type === 'IntentRequest'
      && handlerInput.requestEnvelope.request.intent.name === 'ReportIntent';
  },
  handle(handlerInput) {
    const sessionAttributes = handlerInput.attributesManager.getSessionAttributes();
    const { position } = sessionAttributes;

    let speechText = '';

    if (typeof position === 'undefined') {
      speechText = 'The robot is not in the position yet. You need to place it first.';
    } else {
      const { direction, x, y } = position;

      speechText = `The robot is in position ${x} ${y} facing ${direction}.`;
    }

    return handlerInput.responseBuilder
      .speak(speechText)
      .reprompt(speechText)
      .withSimpleCard(CARD_TITLE, speechText)
      .getResponse();
  },
};
As you can see, this time we are only using getSessionAttributes to read the current position.
We don’t need to update it.
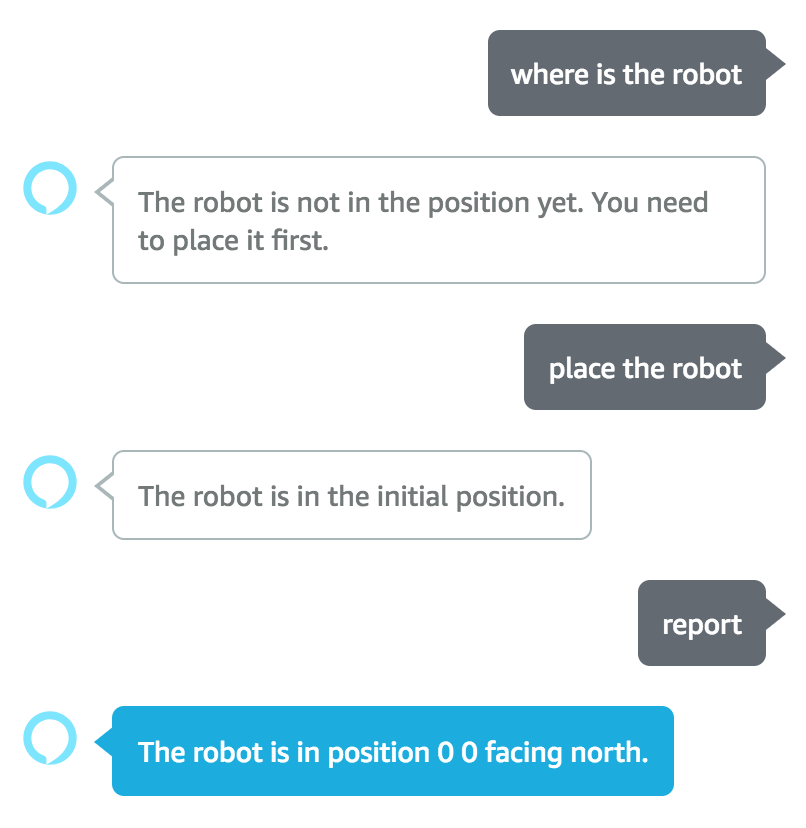
Once we read a position and it exists, then we tell back to a user the current coordinates of the robot. If the position is blank, we assume the robot was not placed yet.
Here is the example of a user’s conversation:
Rotate the robot
As usual, let’s start by defining the intent.
{
  "name": "TurnRightIntent",
  "slots": [],
  "samples": [
    "turn right",
    "right",
    "rotate right"
  ]
}
Then we need to register a request handler:
.addRequestHandlers(
  // ...
  TurnRightIntentHandler,
  // ...
)
And implement the intent itself:
const TurnRightIntentHandler = {
  canHandle(handlerInput) {
    return handlerInput.requestEnvelope.request.type === 'IntentRequest'
      && handlerInput.requestEnvelope.request.intent.name === 'TurnRightIntent';
  },
  handle(handlerInput) {
    const sessionAttributes = handlerInput.attributesManager.getSessionAttributes();
    const { position } = sessionAttributes;
    const rotateDirections = {
      north: 'east',
      east: 'south',
      south: 'west',
      west: 'north'
    };
    let speechText = '';

    if (typeof position === 'undefined') {
      speechText = 'The robot is not in the position yet. You need to place it first.';
    } else {
      position.direction = rotateDirections[position.direction];
      speechText = 'Beep-Boop.';
    }

    handlerInput.attributesManager.setSessionAttributes(sessionAttributes);

    return handlerInput.responseBuilder
      .speak(speechText)
      .reprompt(speechText)
      .withSimpleCard(CARD_TITLE, speechText)
      .getResponse();
  },
};
At first, we read a current position.
In the same way, as we did in ReportIntentHandler we are checking if the robot has been placed at all.
Then we define the rotation directions.
If we turn right, we need to change from the North to the East, from the East to the South and so on.
Then we actually rotate the robot and update session attributes. Because we want them to persist during our session.
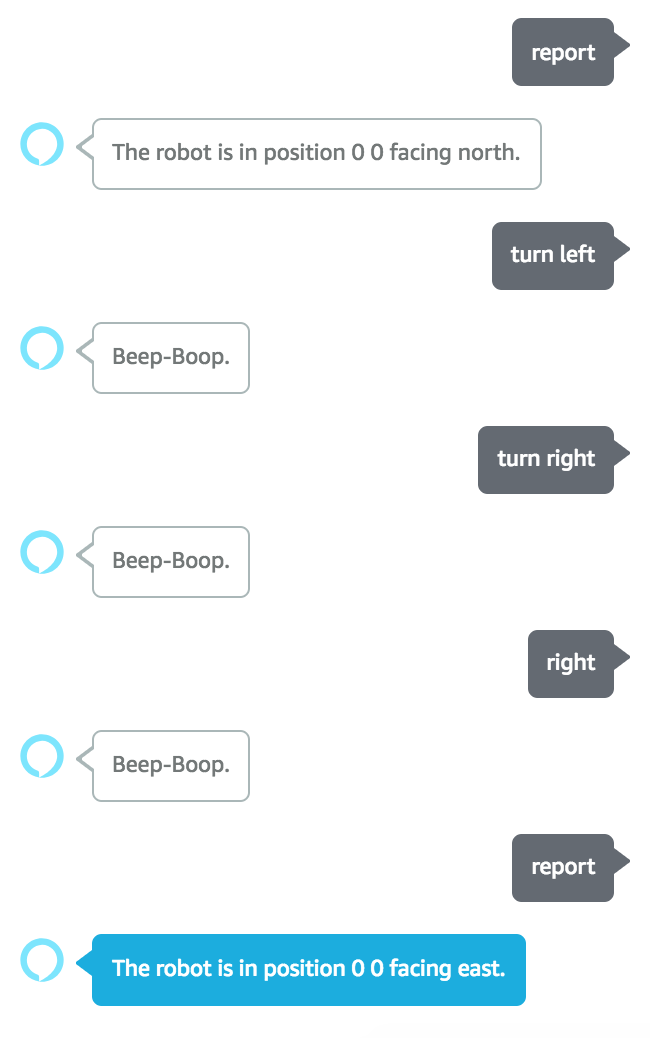
The rotation of the robot to the left is almost identical. I will skip it here. The only difference is the rotation direction. From the North, we rotate to the West, from the West - to the South and so on.
Here is an example again.
Now let’s move and implement the last step. The movement.
Movement
The intent goes first.
{
  "name": "MoveIntent",
  "slots": [],
  "samples": [
    "move",
    "go forward"
  ]
}
Then the handler register.
.addRequestHandlers(
  // ...
  MoveIntentHandler,
  // ...
)
Then the implementation itself.
const MoveIntentHandler = {
  canHandle(handlerInput) {
    return handlerInput.requestEnvelope.request.type === 'IntentRequest'
      && handlerInput.requestEnvelope.request.intent.name === 'MoveIntent';
  },
  handle(handlerInput) {
    const sessionAttributes = handlerInput.attributesManager.getSessionAttributes();
    let { position } = sessionAttributes;
    let speechText = '';

    if (typeof position === 'undefined') {
      speechText = 'The robot is not in the position yet. You need to place it first.';
    } else {
      position = calculateNewPosition(position);
      speechText = 'Beep-Boop.';
    }

    handlerInput.attributesManager.setSessionAttributes(sessionAttributes);

    return handlerInput.responseBuilder
      .speak(speechText)
      .reprompt(speechText)
      .withSimpleCard(CARD_TITLE, speechText)
      .getResponse();
  },
};
As you can see. It’s again very similar to the intents we have implemented before. We read the session attributes, change them and update again.
The difference here in calculation of a new position:
position = calculateNewPosition(position);
Here is the implementation of that function:
const calculateNewPosition = (position) => {
  switch (position.direction) {
    case 'north':
      position.x = Math.min(position.x + 1, 4);
      return;
    case 'east':
      position.y = Math.min(position.y + 1, 4);
      return;
    case 'south':
      position.x = Math.max(position.x - 1, 0);
      return;
    case 'west':
      position.x = Math.max(position.y - 1, 0);
      return;
    default:
  }

  return position;
};
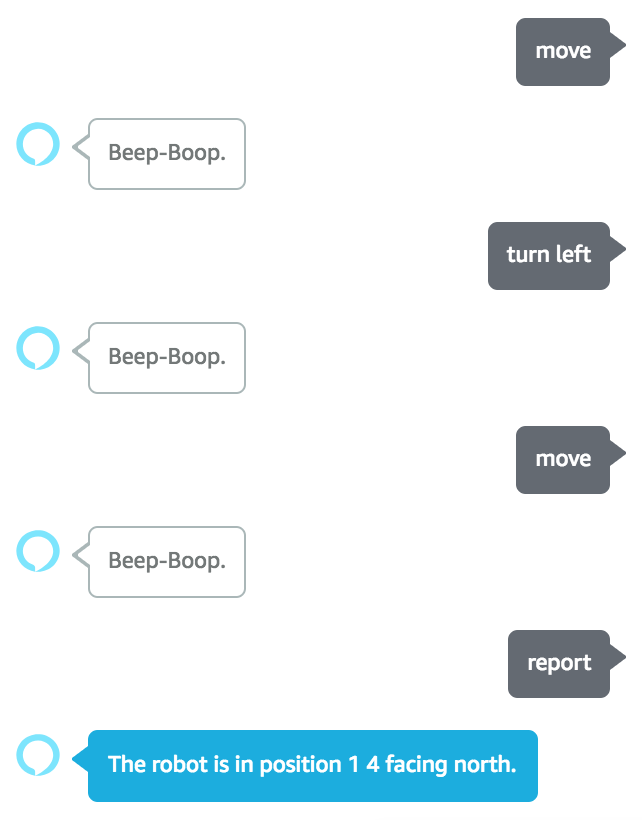
We are moving the robot depending on where it’s facing. In addition, we prevent the robot to fall from the table. That is why are not going above 4 and below 0 in coordinates.
There is an example after I’ve made a couple of moves.
Wrapping up
That is it. You can see that using the session attributes is quite a trivial task. Even though, I was trying to provide more examples and make the article more complete.
Now, having tools like capture user input and sharing attributes between intents you can build quite powerful skills.
You can find the complete source code on the GitHub page.
See you next time.