
In the previous articles, we took a look at how to arrange view and create buttons. That helps us to build the user interface for our mobile apps. That won’t be a reach interface, but that just the beginning.
The mobile apps don’t only operate with static data. They are also getting data from a user and provide some data back.
Now, a mobile app should be able to hold data somewhere and be able to amend it.
In this article, we are going to learn about a state.
When defining a SwiftUI view, we can describe one or several state properties to hold some values. Then we can read those values from the state, and update it.
Let’s see that on a quite common example.
We’ll have a counter label and a button, every time we tap on the button, that will increase a counter by one.
As the first step, we are going to build a user interface.
struct ContentView: View {
  var body: some View {
    VStack {
      Text("Counter: 0")
        .padding()

      Button("Plus one", action: {

      })
    }
  }
}
That’s a simple interface, and it’s static. The button doesn’t do anything, and the counter always displays zero.
Now, we need to define a state of the counter, so it can hold a current value, that we will be able to change.
Defining state property in SwiftUI is very similar to defining property of a Swift class or struct.
The only difference is that we need to add @State in front of that.
struct ContentView: View {
  @State private var counter = 0

  var body: some View {
    // ...
  }
}
That’s it. Now we can use it.
We use the state as a usual property. Nothing fancy.
Let’s change your label. Replace:
Text("Counter: 0")
with
Text("Counter: \(counter)")
If we run the app now, we won’t notice any difference. Even though we are reading the state, we aren’t changing it yet.
So let’s change it every time we tap the button.
Update the button’s code to be:
Button("Plus one", action: {
  self.counter += 1
})

Now, if we run the app and start tapping on the button, we’ll see that the number goes up.
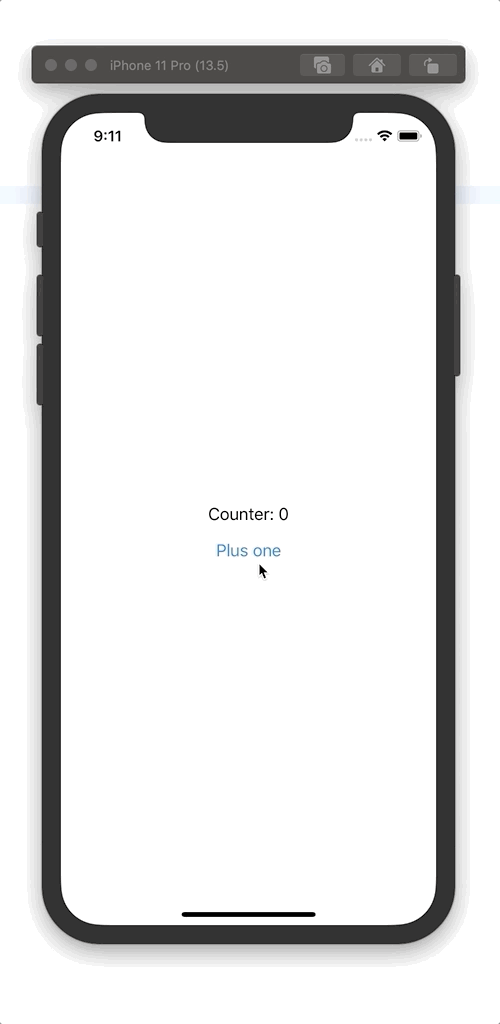
Every time the state of a view changes, SwiftUI updates the user interface to reflect the changes.
That’s a very simple example, but it creates a foundation.
Let’s look at another example to consolidate our knowledge about the state.
struct ContentView: View {
  @State private var volume = 0

  var body: some View {
    HStack {
      Button("-", action: { self.volume -= 20 })
        .disabled(volume == 0)

      Text("Volume: \(volume)%")
        .frame(width: 200)
        .padding()

      Button("+", action: { self.volume += 20 })
        .disabled(volume == 100)
    }
  }
}

Let’s see what do we have here.
There is a state property named volume.
There are also two buttons and a volume label.
Tapping on “plus” button increases the volume, and tapping on the “minus” button decreases it. When we reach the volume limit, we disable the button. So we can’t go below 0% and higher than 100%.
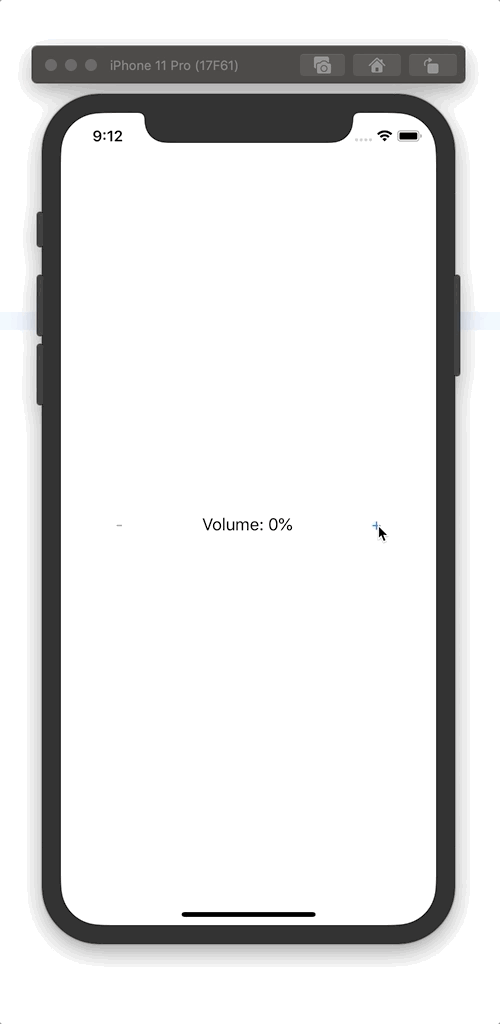
In other words, in this example, we are changing the state when we tap the buttons. Then we read the state and use its value to decide whether we need to disable buttons.
Wrapping up
We can define state properties for our views. Then we can use those properties as usual variables. We can update them, we can read from them. When a state is changed, SwiftUI updates the user interface so that we can see the results on the screen.