
In the previous article we took a look at the basic animation examples. Today we are going to dive deeper into React Native animation and figure out what else can we achieve.
Animation types
Animated module ships with three animation types:
- timing - to animate a value over time
- spring - to animate using spring physics model
- decay - to gradually slow down a value starting from its velocity
Timing
We already covered timing in the examples from the previous article.
You could check them out here.
Spring
Spring helps us emulate a real-world spring physical movement.
It accepts three groups of options to control the behavior of the spring. We can use only a single group in a single configuration.
Those options are:
friction/tensionspeed/bouncinessswiftness/damping/mass
In our example, we are going to focus on friction/tension options.
You can find the description of every option on the official documentation page.
So, what are friction and tension?
Friction controls how quickly the spring calms down. tension is the energy of that spring.
The default values are 7 for friction, and 40 for tension.
In our examples, we are going to use the same component structure as in the previous article. Let’s quickly recall that structure.
At the top of the file, we import all required modules for the component.
We import Animated module to use animations
import React from 'react';
import { Animated } from 'react-native';
Then we define a component to hold our example. We define an animation state, render an object, and configure its styles.
class SpringVerticalMotionExample extends React.Component {
  state = {
    animation: new Animated.Value(0)
  }

  render() {
    const animationStyles = {
      transform: [
        { translateY: this.state.animation }
      ]
    };

    return (
      <Animated.View style={[objectStyles.object, animationStyles]}>
      </Animated.View>
    );
  }
}

const objectStyles = {
  object: {
    backgroundColor: 'orange',
    width: 100,
    height: 100
  }
}
Then we use componentDidMount() callback to start our animation.
In the following examples, we are going to update only componentDidMount() callback to check different types of animation.
Now we are ready to move to the spring animation example.
componentDidMount() {
  Animated.spring(
    this.state.animation,
    {
      toValue: 250,
      duration: 2000,
      friction: 1,
      tension: 20
    }
  ).start();
}
As you can see from the excerpt above, we are using the Animated.spring function which accepts the animation value and set of options.
Here we are going to change the animation value from 0 to 250 within two seconds.
I’ve reduced the friction value to 1 and tension to 20. That makes the spring jumpier.
Here is the example.

And there is a complete source code of that example.
Decay
Decay used to animate the value from its initial velocity down to zero using the deceleration option.
state = {
  animation: new Animated.Value(-150)
}

componentDidMount() {
  Animated.decay(
    this.state.animation,
    {
      toValue: 200,
      duration: 2000,
      velocity: 0.95,
      deceleration: 0.998 // By default equals to 0.997
    }
  ).start();
}
To demonstrate that we are going to use Motion example from the previous article.
Here we are moving the box down the screen. Once the box reaches the finishing line at 200 points below the center, the decay effect applies. The box keeps moving, but its speed is slowing down until it stops.
Check the example below. To see it in comparison, you can see the decay effect on the left, and motion example on the right.

Check out the source code of that example.
Loop
When we want to repeat our animation we can use Animated.loop function.
It accepts animation and optional settings.
Let’s take the rotation example from the previous article and repeat it twice.
componentDidMount() {
  const rotateAnimation = Animated.timing(
    this.state.animation,
    {
      toValue: 1,
      duration: 2000
    }
  );

  Animated.loop(
    rotateAnimation,
    {
      iterations: 2
    }
  ).start();
}
To specify the number of iterations we’re passing the eponymous option.
By default, the number of iterations is -1.
That makes the animation repeat an infinite amount of times.
Native driver
Animated module performs animations on the JavaScript side of React Native and shares a single thread. That can prevent animations works smoothly.
There is a way to move animations into the native UI using useNativeDriver: true option.
For example, this is how we can run spring animation using the native driver.
componentDidMount() {
  Animated.spring(
    this.state.animation,
    {
      toValue: 250,
      duration: 2000,
      friction: 1,
      tention: 20,
      useNativeDriver: true
    }
  ).start();
}
You can read more about the native driver from React Native docs.
Easing
We can apply various easing functions to our animation.
To use those function we need to import Easing module.
import { Animated, Easing } from 'react-native';
Then we can pass the easing option to a timing animation.
Here is the example of using a bounce effect.
componentDidMount() {
  Animated.timing(
    this.state.animation,
    {
      toValue: 250,
      duration: 3000,
      easing: Easing.bounce
    }
  ).start();
}
There is the source code of that example.
You can find more easing functions in the documentation https://facebook.github.io/react-native/docs/easing And all the predefined visual examples of easing functions on easings.net.
Composition functions
Sometimes you may need to have several animations work together. You can use composition functions to achieve different behavior.
Let’s start with the sequence.
Sequence
Sequence is used to run several animations one after another.
To achieve that we are passing an array of animations to Animated.sequence function and start them.
state = {
  transformAnimation: new Animated.Value(0),
  fallAnimation: new Animated.Value(0)
}

componentDidMount() {
  const transformToBallAnimation = Animated.timing(
    this.state.transformAnimation,
    {
      toValue: 50,
      duration: 1000
    }
  );

  const fallAnimation = Animated.timing(
    this.state.fallAnimation,
    {
      toValue: 250,
      duration: 3000,
      easing: Easing.bounce
    }
  );

  Animated.sequence([
    transformToBallAnimation,
    fallAnimation
  ]).start();
}
Here is how the render method looks like. One animation value is responsible for updating the border radus, while the other is responsible for the motion.
render() {
  const animationStyles = {
    borderRadius: this.state.transformAnimation,
    transform: [
      { translateY: this.state.fallAnimation }
    ]
  };

  return (
    <Animated.View style={[objectStyles.object, animationStyles]}>
    </Animated.View>
  );
}
Above we have two animations. The first one transforms a box into a ball. The second one moves the ball down the screen and applies a bounce effect.
As you can see the ball doesn’t start to move until the transformation animation is in progress.
Here is the source of that example.
Parallel
We can start several animations at the same time.
Let’s use parallel instead of sequence and check how it works.
state = {
  transformAnimation: new Animated.Value(0),
  fallAnimation: new Animated.Value(0)
}

componentDidMount() {
  const transformToBallAnimation = Animated.timing(
    this.state.transformAnimation,
    {
      toValue: 50,
      duration: 1000
    }
  );

  const fallAnimation = Animated.timing(
    this.state.fallAnimation,
    {
      toValue: 250,
      duration: 3000,
      easing: Easing.bounce
    }
  );

  Animated.parallel([
    transformToBallAnimation,
    fallAnimation
  ]).start();
}
This time, the box starts moving and transforming at the same time. It finishes its transformation close to the end of the animation.
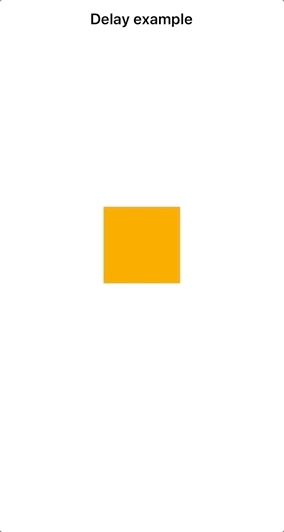
Delay
When we use sequence animation, we can define a delay in between.
state = {
  transformAnimation: new Animated.Value(0),
  fallAnimation: new Animated.Value(0)
}

componentDidMount() {
  const transformToBallAnimation = Animated.timing(
    this.state.transformAnimation,
    {
      toValue: 50,
      duration: 1000
    }
  );

  const fallAnimation = Animated.timing(
    this.state.fallAnimation,
    {
      toValue: 250,
      duration: 3000,
      easing: Easing.bounce
    }
  );

  Animated.sequence([
    transformToBallAnimation,
    Animated.delay(1000),
    fallAnimation
  ]).start();
}
As you can expect that adds a small pause after finishing transforming the box.
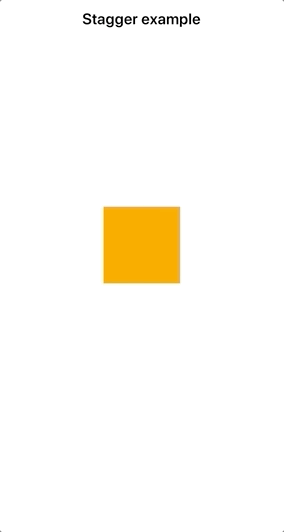
Stagger
Sometimes we may need something in between sequence and parallel. Imagine we need to start an animation and then start yet another one before the first one is finished.
To achieve that behavior we can use Animated.stagger function.
It accepts the delay before starting following animations, and the list of animations.
state = {
  transformAnimation: new Animated.Value(0),
  fallAnimation: new Animated.Value(0)
}

componentDidMount() {
  const transformToBallAnimation = Animated.timing(
    this.state.transformAnimation,
    {
      toValue: 50,
      duration: 1000
    }
  );

  const fallAnimation = Animated.timing(
    this.state.fallAnimation,
    {
      toValue: 250,
      duration: 3000,
      easing: Easing.bounce
    }
  );

  Animated.stagger(500, [
    transformToBallAnimation,
    fallAnimation
  ]).start();
}
In that case, the box starts to transform, then half a second later it starts to move.
Here is the complete source.
Wrapping up
Today we’ve covered different animation types: timing, spring, and decay.
We’ve learned how to loop our animations and apply easing functions.
Then we’ve got to know composition functions.
Using those functions we can combine our animations and run them in parallel or in a different sequence.
I think that builds a good knowledge foundation. Now you should be ready to start using animation in your projects. Go and try it out.
See you next time.
The complete course code of all these examples you can find on the GitHub page.