
Internationalization (i18n for short) is the process of adapting an application to work with different languages and regions.
That can bring some benefits to the table. Your target group can be broader than the one with the default language of the app. So by internationalizing an app, you may reach a bigger audience.
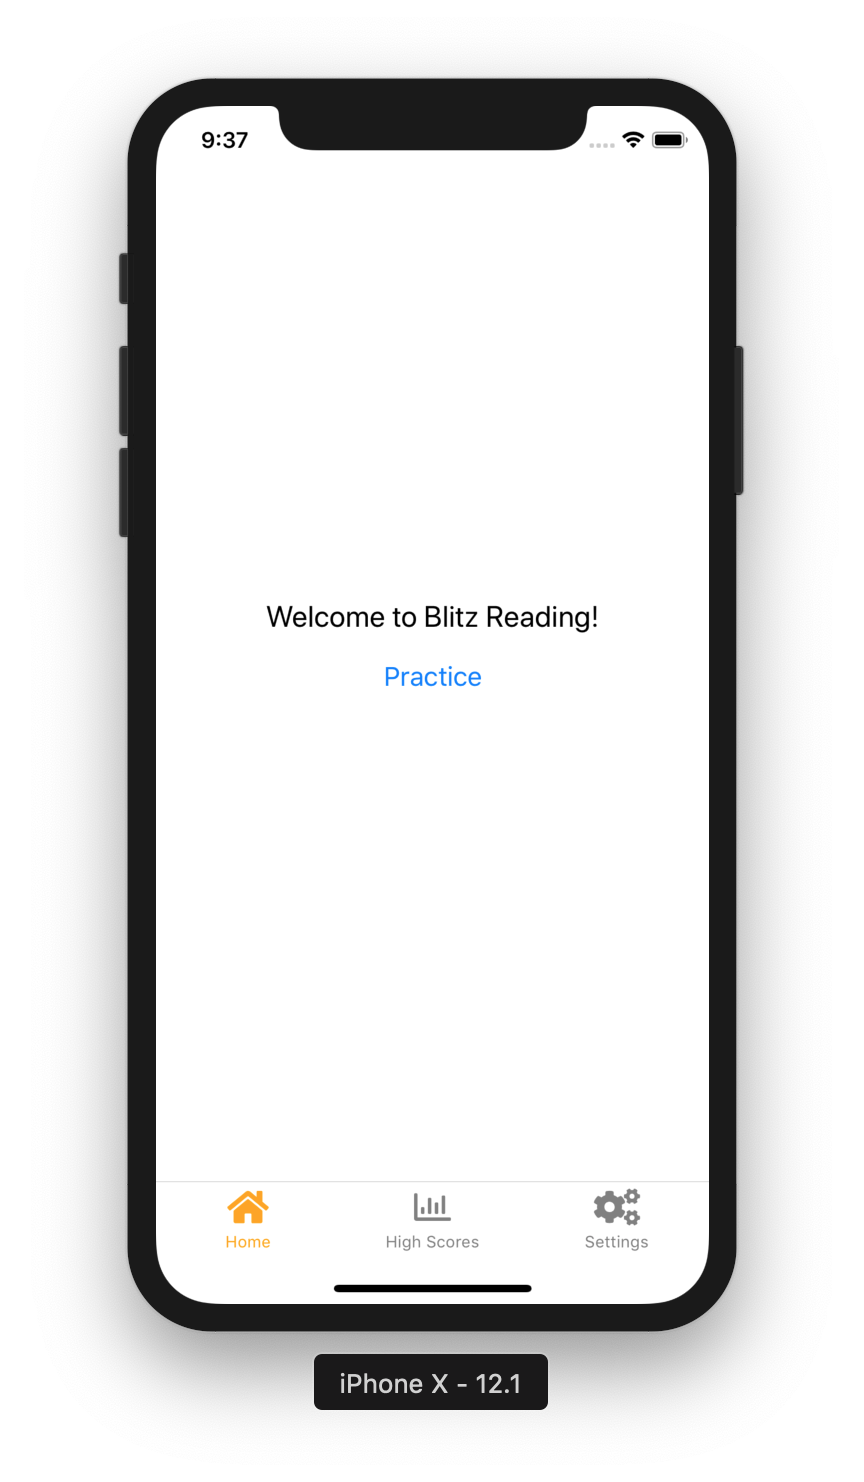
Let’s take a Blitz Reading application as an example. The application allows kids to practice reading sight words. The more languages we add the more kids can practice reading.
Let’s internationalize the app!
We can internationalize a React Native application almost like any other JavaScript application. We can even reuse some JavaScript libraries to achieve our goal.
So today, our implemenation will be based on i18n-js library.
Fist, let’s install it via npm or yarn:
→ npm install --save i18n-js
→ yarn add i18n-js
Once we have a library installed we need to configure it for our needs.
Let’s create a src/i18n.js file with the following content.
import i18n from 'i18n-js';

import en from './locales/en.json';
import de from './locales/de.json';

i18n.defaultLocale = 'en';
i18n.locale = 'en';
i18n.fallbacks = true;
i18n.translations = { en, de };

export default i18n;
let’s slow down of a minute and take a look what do we have here.
First, we are importing the module from the library itself.
Next two lines import en and de translation keys. We will create those files in a bit.
Then, we configuring the library for our needs. We define a default locale to be en.
Then, we set a current locale to en as well.
We enable fallbacks. That means that if our secondary display language is missing some translations, we are going to display (fallback) the ones from the default language. Which is English in our case.
Then we specify the list of available locales. Which is English and German in our case.
As the last step, we are importing already configured i18n library to use inside our application.
ok, the library is configured, but we still missing the translation files we were importing at the second step.
Create two locale files src/locales/en.json and src/locales/de.json
en.json:
{
  "appName": "Blitz Reading",
  "navigation": {
    "home": "Home",
    "highScores": "High Scores",
    "settings": "Settings"
  },
  "home": {
    "welcome": "Welcome to %{appName}!"
  }
}
de.json:
{
  "appName": "Blitzlesen",
  "navigation": {
    "home": "Startseite",
    "highScores": "Highscores",
    "settings": "Einstellungen"
  },
  "home": {
    "welcome": "Willkommen im %{appName}!"
  }
}
Let’s see what is going on here.
We define translation keys as a JSON object.
We can nest them and can pass additional information into some keys.
For example "home.welcome" key. As you can see it accepts appName as a piece of custom information.
We have defined translations, now we are ready to start using them.
To display internationalized information on the page we can use i18n.t() function by passing a translation key as an argument.
Let’s try it out.
Open the src/screens/WelcomeScreen.js file.
First, we need to import the configured library in order to use it.
import i18n from '../i18n';
Now replace our button text:
<Button
  onPress={() => this.props.navigation.navigate('Practice')}
  title="Practice"
/>
to
<Button
  onPress={() => this.props.navigation.navigate('Practice')}
  title={i18n.t('home.start_practice')}
/>
Now let’s replace the welcome message itself.
<Text style={styles.welcome}>Welcome to Blitz Reading!</Text>
<Text style={styles.welcome}>
  {i18n.t('home.welcome', { appName: i18n.t('appName')})}
</Text>
In the last example you can see how do we pass additional information into a translation key.
To achieve that we need to describe the key to have a %{someKey} inside and then we can pass an object as a second argument to i18n.t() function.
Once we have these changes we can check them on the screen.
To do that we can manually change the value of i18n.locale to en or de in src/i18n.js file.

Once we release the app users won’t be able to change the language in the same way as we did now. Thus, we need to bind the ability to change a display language with the functionality we’ve implemented in one of the previous articles.
In the current application, we keep the user’s locale in local storage.
That means we need to retrieve it first, then set an i18n.locale value.
Retrieving data from local storage is an asynchronous task and it’s not instant. Thus the app won’t wait for the task to be finished and will render the application with the default display language.
That means we need to wait a little bit, to fetch the display language from local storage and set the current locale. That’s where a Splash Screen comes in handy. The one we have implemented in the previous article.
We are going to fetch and set a display language in the componentDidMount() callback of the SplashScreen component.
async componentDidMount() {
  const settings = await loadSettings();

  if (settings !== null) {
    i18n.locale = settings.locale;
    this.props.navigation.navigate('App');
  }
}
Next, we need to import i18n and loadSettings.
import i18n from '../i18n';
import { loadSettings } from '../storage/settingsStorage';
Now we can change the display language and reload the app to see the updated interface.
So far we are displaying translated text on the welcome page, now let’s try to update the bottom navigation buttons.
We use React Navigation to render navigation buttons at the bottom of the screen. When we define the navigator we can specify custom text for every button. For example, that’s how we the “High Scores” menu customized at the moment:
const AppNavigator = createBottomTabNavigator(
  {
    Home: { /* ... */ },
    HighScores: {
      screen: HighScoresScreen,
      navigationOptions: {
        tabBarLabel: 'High Scores',
        tabBarIcon: ({ horizontal, tintColor }) =>
          <Icon name="chart-bar" size={horizontal ? 20 : 25} color={tintColor} />
      }
    },
    Settings: { /* ... */ }
  },
  {
    // ...
  }
);
We know how to use translation function already so we may think we should replace the text with the I18n.t() call.
tabBarLabel: i18n.t('navigation.highScores')
In that case, the translated key will be picked up only when an application runs. If we would need to change it later on the fly, that label will remain unchanged.
The tabBarLabel option allows us to pass a callback function as a value. The function should return a <Text><Text> component.
Let’s update it:
tabBarLabel: () =>
  <Text>{i18n.t('navigation.highScores')}</Text>,
That produces the following result:
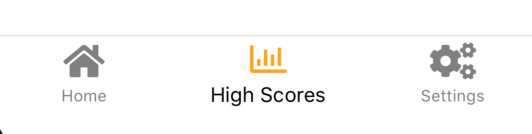
As you can see the label looks unstyled now. The text is bigger and has a default color.
Looks like we need to throw some styles to the Text component:
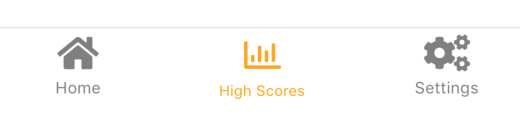
tabBarLabel: ({ tintColor }) => (
  <Text style={ { fontSize: 10, color: tintColor } }>
    {i18n.t('navigation.highScores')}
  </Text>
),
Great. Now it looks the same as its neighbors.
So far we’ve learned how to internationalize a user interface.
The specifics of the current app requires us to provide localized content during the practice session.
Currently, when a user starts a practice session we preload the set of words from the src/words.json file and use them.
You can find more information about that practice session in the following articles.
Now, knowing the display language of the user, we should use the right list of words.
In the src/screens/PracticeScreen.js we need to replace:
import allWords from '../words.en.json';
with
import i18n from '../i18n';

import enWords from '../words.en.json';
import deWords from '../words.de.json';
Here we are preloading two sets of words and the i18n library.
Now we need to choose the required set of words for a practice session.
Update componentDidMount() method to do so:
componentDidMount() {
  setTimeout(() => (
    this.props.navigation.navigate('Results', {
      totalWords: this.state.totalWords
    })
  ), PRACTICE_TIME);

  // That's our new line
  const allWords = i18n.locale == 'de' ? deWords : enWords;

  const words = shuffle(allWords);
  const currentWord = words.shift();

  this.setState({
    currentWord,
    words,
    totalWords: 0
  });
}
That’s pretty much it. Now the practice starts with the correct set of words.
Wrapping up
We have learned today how to internationalize React Native applications. Now we can reach more users.
The functionality of internationalization doesn’t stop here. There are ways to localize date and time formats. There are ways to use pluralization etc.
In that application we let a user pick a display language from the settings. That’s not the only way.
Depending on your needs you may choose another approach. For example, you can detect and use a system language of a user’s phone. To achieve that you can use react-native-languages library.
There are various ways to apply internationalization of mobile applications. That’s was one of them.
See you next time.
You can find the complete example on the GitHub page of the project.